
How To Install Honda Detent Springs
Posted by Matthew Marks on 2nd Aug 2024
Today, we will show you how to install Honda detent springs, the best way to do so, torque values, and the tools needed for installation.
By the end of this guide, you will be confident in how to install the springs. It should only take 30-60 minutes, depending on your setup and whether you need to remove anything to access the detent bolts!
We have used aftermarket heavy-duty detent springs in many of our builds, and for the money, they are one of the best bang-for-buck transmission modifications.
In this case, the gearbox is out of the car, but everything in this guide will still apply, whether the gearbox is in or out of the car.
The gearbox I will be using today is my friends K-Series gearbox, although whether you have a B-Series or any other Honda gearbox, you can still follow this guide for installation, provided you can find the detent bolts.
I've had these springs installed in my own B-Series gearbox for a while, and they have hugely transformed the shifter's feel, making gear changes feel much tighter.
If you would rather watch our video on installing these springs, click the video below and subscribe to our YouTube channel while you're there for more content coming up in the future. This massively helps us to create more guides like this one!
Let's move on to the tools you will need for this installation.
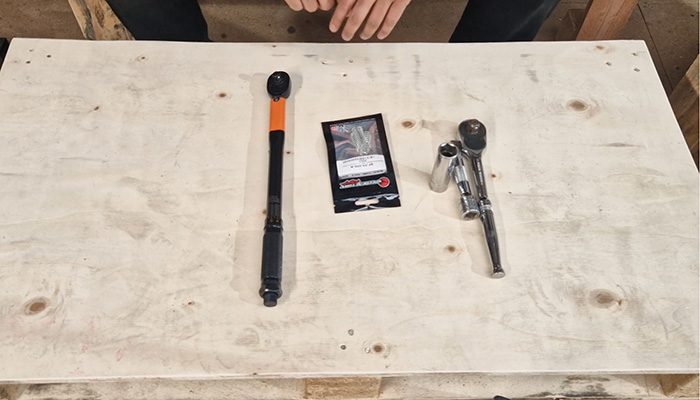
Tools Needed For Installation:
You will need a few tools to start this job, so make sure you have gathered all of these before starting the installation.
Luckily there are only a few things you will need to do this correctly!
Tools:
- Heavy-duty detent springs
- Ratchet
- Socket
- Extension Bar
- Torque Wrench
Now, let's move on to installing your new upgraded springs.
Steps For Installing Heavy-Duty Detent Springs:
1. Find the detent spring bolts
First, you will need to find the detent spring bolts. Depending on your gearbox, there are a few ways to do this: You can find an exploded diagram of your specific gearbox online, ask someone who has done this install before or get in touch with us, and we can try to help you locate them.

The photo above will show where the detent springs are on our K-Series gearbox, but this will change depending on what you are using.
Also, Speedfactory has made handy images of the K-Series, B-Series, and D-Series gearboxes showing where to locate these, I will add this below to help any of you using any of the three gearboxes.

As a side note, you may have to remove the gearbox mount sometimes, as the detent bolts could be underneath the mount.
2. Remove anything in the way
You will now have to remove anything that makes this installation difficult. This could be an intake pipe, gearbox mount, battery tray, or combination.

You will need enough room to use a ratchet on the bolts to remove them.
2. Remove the detent spring bolts
Start by removing one of the detent spring bolts, careful not to lose any parts. Inside the bolt you will find a spring and a ball on the end of it.

Once you have removed the bolt, do not let anything fall into the hole, as this could affect shifting in the future. You are always better off doing the next few steps individually to reduce the chance of making mistakes.
3. Remove the old detent springs
Now you have the bolt removed, take out the spring from the bolt.

You will notice that the new springs will be longer and stiffer than the OEM detent springs. This is intentional, as they are up to 80% stronger and will give you a more positive shifting feel.

They are easy to remove by just pulling them out of the bolt.
4. Install the new detent springs and ball
Now, take the brand new upgraded springs and put them back into the bolt in the same way the OEM version was removed.

Put the ball on the end of the spring and you are ready to install.
There isn't a wrong way to do this step, providing you do the steps in reverse order to how you removed them.

5. Install and torque the bolt and repeat
Now put the bolt, spring and ball back into the hole and tighten them around finger tight. Do this for all of the detent bolts you are changing, and once you have installed them, you can start to torque them.

As a word of warning, torquing the bolts is incredibly important as you don't want to strip the threads or break the bolt itself.
Torque the bolts back to the factory setting, 16 Ft/Lb on most Honda gearboxes, such as the B-Series and K-Series. Please double-check this before you torque them.

6. Install everything you removed earlier
The last step is to install everything you removed from step 2, such as the intake pipe, gearbox mount, etc.

After briefly driving the car, double-check the torque setting and ensure no oil leakage from the bolts. If there is, retorque the bolts and you are ready to go!
You have installed your brand-new heavy-duty shifter springs and can enjoy one of the best bang-for-buck gearbox modifications!
Products Used In This Guide:
We have used a few products in this guide that we currently sell; if you are interested, we will add the product links below and use this specific reader discount code for a discount on the order:
BLOG5
Speedfactory Honda K-Series detent springs
Frequently Asked Questions
We asked a few common questions about detent springs, so we will try to answer all of them below. If you have any questions that you would like answered, please comment at the bottom of this post!
Q. What are detent springs?
A. A detent is a spring with a ball on its end, which holds pressure against the shifter fork. This preload keeps the fork in place using a notch on the shaft.
This resistance holds the selector in gear and is what you feel when changing into gear.
Q. Why do you need heavy-duty detent springs?
A. Heavier-duty detent springs are up to 80% stiffer than the OEM springs, allowing for a more precise feel when changing gears. Stronger springs will upgrade the movement and offer a more direct gear engagement.
Conclusion
So there we have it, our detent spring installation guide. You should now know every step in finding the detent springs, how to install them, the torque values and everything else detent spring related!
If you have any more questions or want to let us know if this guide has helped you, please comment below. We love reading your responses.
For more related installation guides, head over to our other guides below, and we will see you in the next guide: