
Honda Civic FN2 Fan Shroud Fitting Guide
Posted by Matthew Marks on 1st Aug 2024
Honda Civic FN2 Fan Shroud Fitting Guide
This guide explains how to fit an upgraded radiator fan shroud to a Honda Civic FN2 Type R, including removal, fan wiring, polarity table, fitment checks, and first-start testing.
Based on Brett's FN2 install using a Tegiwa radiator, SPAL fans and the 2442cfm fan shroud kit.
Shop FN2 Fan Shroud KitThe simple answer
To fit an FN2 fan shroud, remove the radiator and original fan assembly, unplug both fan connectors and the lower temperature sensor, transfer or fit the SPAL fans to the aluminium shroud, then reinstall the assembly using the original mounting points.
The wiring is the part that needs the most care. The SPAL fans use twin-pin connectors, so the original FN2 loom usually needs to be joined to the fan wiring with a suitable waterproof connector.
Before final assembly, check the fan direction, radiator clearance, coolant level and A/C fan operation. Wrong polarity can make the fan blow air the wrong way, causing cooling problems rather than fixing them.
- The FN2 install normally involves removing the radiator and original fans as an assembly.
- The original fan assembly is held with four 10mm M6 bolts, plus two fan plugs and one lower temperature sensor plug.
- The passenger side fan is linked to the air conditioning system, so do not assume it will run at the same time as the main radiator fan.
- Always test fan direction before driving the car, because incorrect polarity will push air the wrong way.
What This Guide Covers
This is a fitting guide for the Honda Civic FN2 Type R fan shroud setup. The car used for this install had a Tegiwa radiator, and the original fans fitted that radiator without modification, so the same broad process applies to OEM-style FN2 radiator fitments and compatible aftermarket radiator setups.
The reason this page matters is simple: most people do not get stuck because the shroud is hard to bolt on. They get stuck because of access, wiring, fan direction, A/C fan behaviour, or not checking the system properly afterwards.
If you are still choosing a fan or trying to understand radiator airflow first, our guide on how to choose the right radiator fan size, CFM, push and pull setup, explains the wider fan selection side.
Tools And Parts Needed
The exact tool list can vary depending on your radiator, hose clamps and connector choice, but this is what we would prepare before starting the job.
Tools
- 10mm socket or spanner for the fan mounting bolts.
- Ratchet, extensions and basic hand tools.
- Coolant drain tray if the radiator is being removed.
- Pliers or hose clip tool.
- Crimping tool, soldering tools or the correct connector tooling.
- Multimeter or test light for checking polarity.
Parts
- Honda Civic FN2 fan shroud kit.
- SPAL fans are supplied with the kit.
- O-rings and metal collars for the lower tabs.
- Waterproof two-pin connectors, such as Deutsch connectors.
- Heat shrink or suitable loom protection.
- Fresh coolant if the system is drained.
Before You Start
Let the engine cool fully before working around the radiator, coolant hoses or temperature sensor. The FN2 cooling system can hold pressure when hot, so do not rush the job straight after driving.
You should also disconnect the battery before cutting or joining fan wiring. The fan circuit can start unexpectedly if the car commands the fan on, and you do not want to be working around live wiring or fan blades.
If your FN2 is turbocharged, supercharged or running a larger radiator package, spend a few minutes checking clearance around pipework, intercooler routing, wiring and coolant hoses. Cooling fans are part of the wider heat management picture, but they will not fix poor routing, damaged wiring or a coolant system fault on their own.
For broader cooling and engine bay heat advice, see our guides on ways to reduce engine bay temperatures and common engine bay heat problems with simple solutions.
Step 1: Remove The Radiator And Original Fans
Start by removing the radiator assembly so you can access the original fan shroud properly. On this install, the original fans were held on with four 10mm M6 bolts.
You will also need to unplug three connectors: the two fan plugs at the top and the temperature sensor plug at the bottom. Keep track of which plug came from which side because the passenger side fan has different behaviour to the main radiator fan.
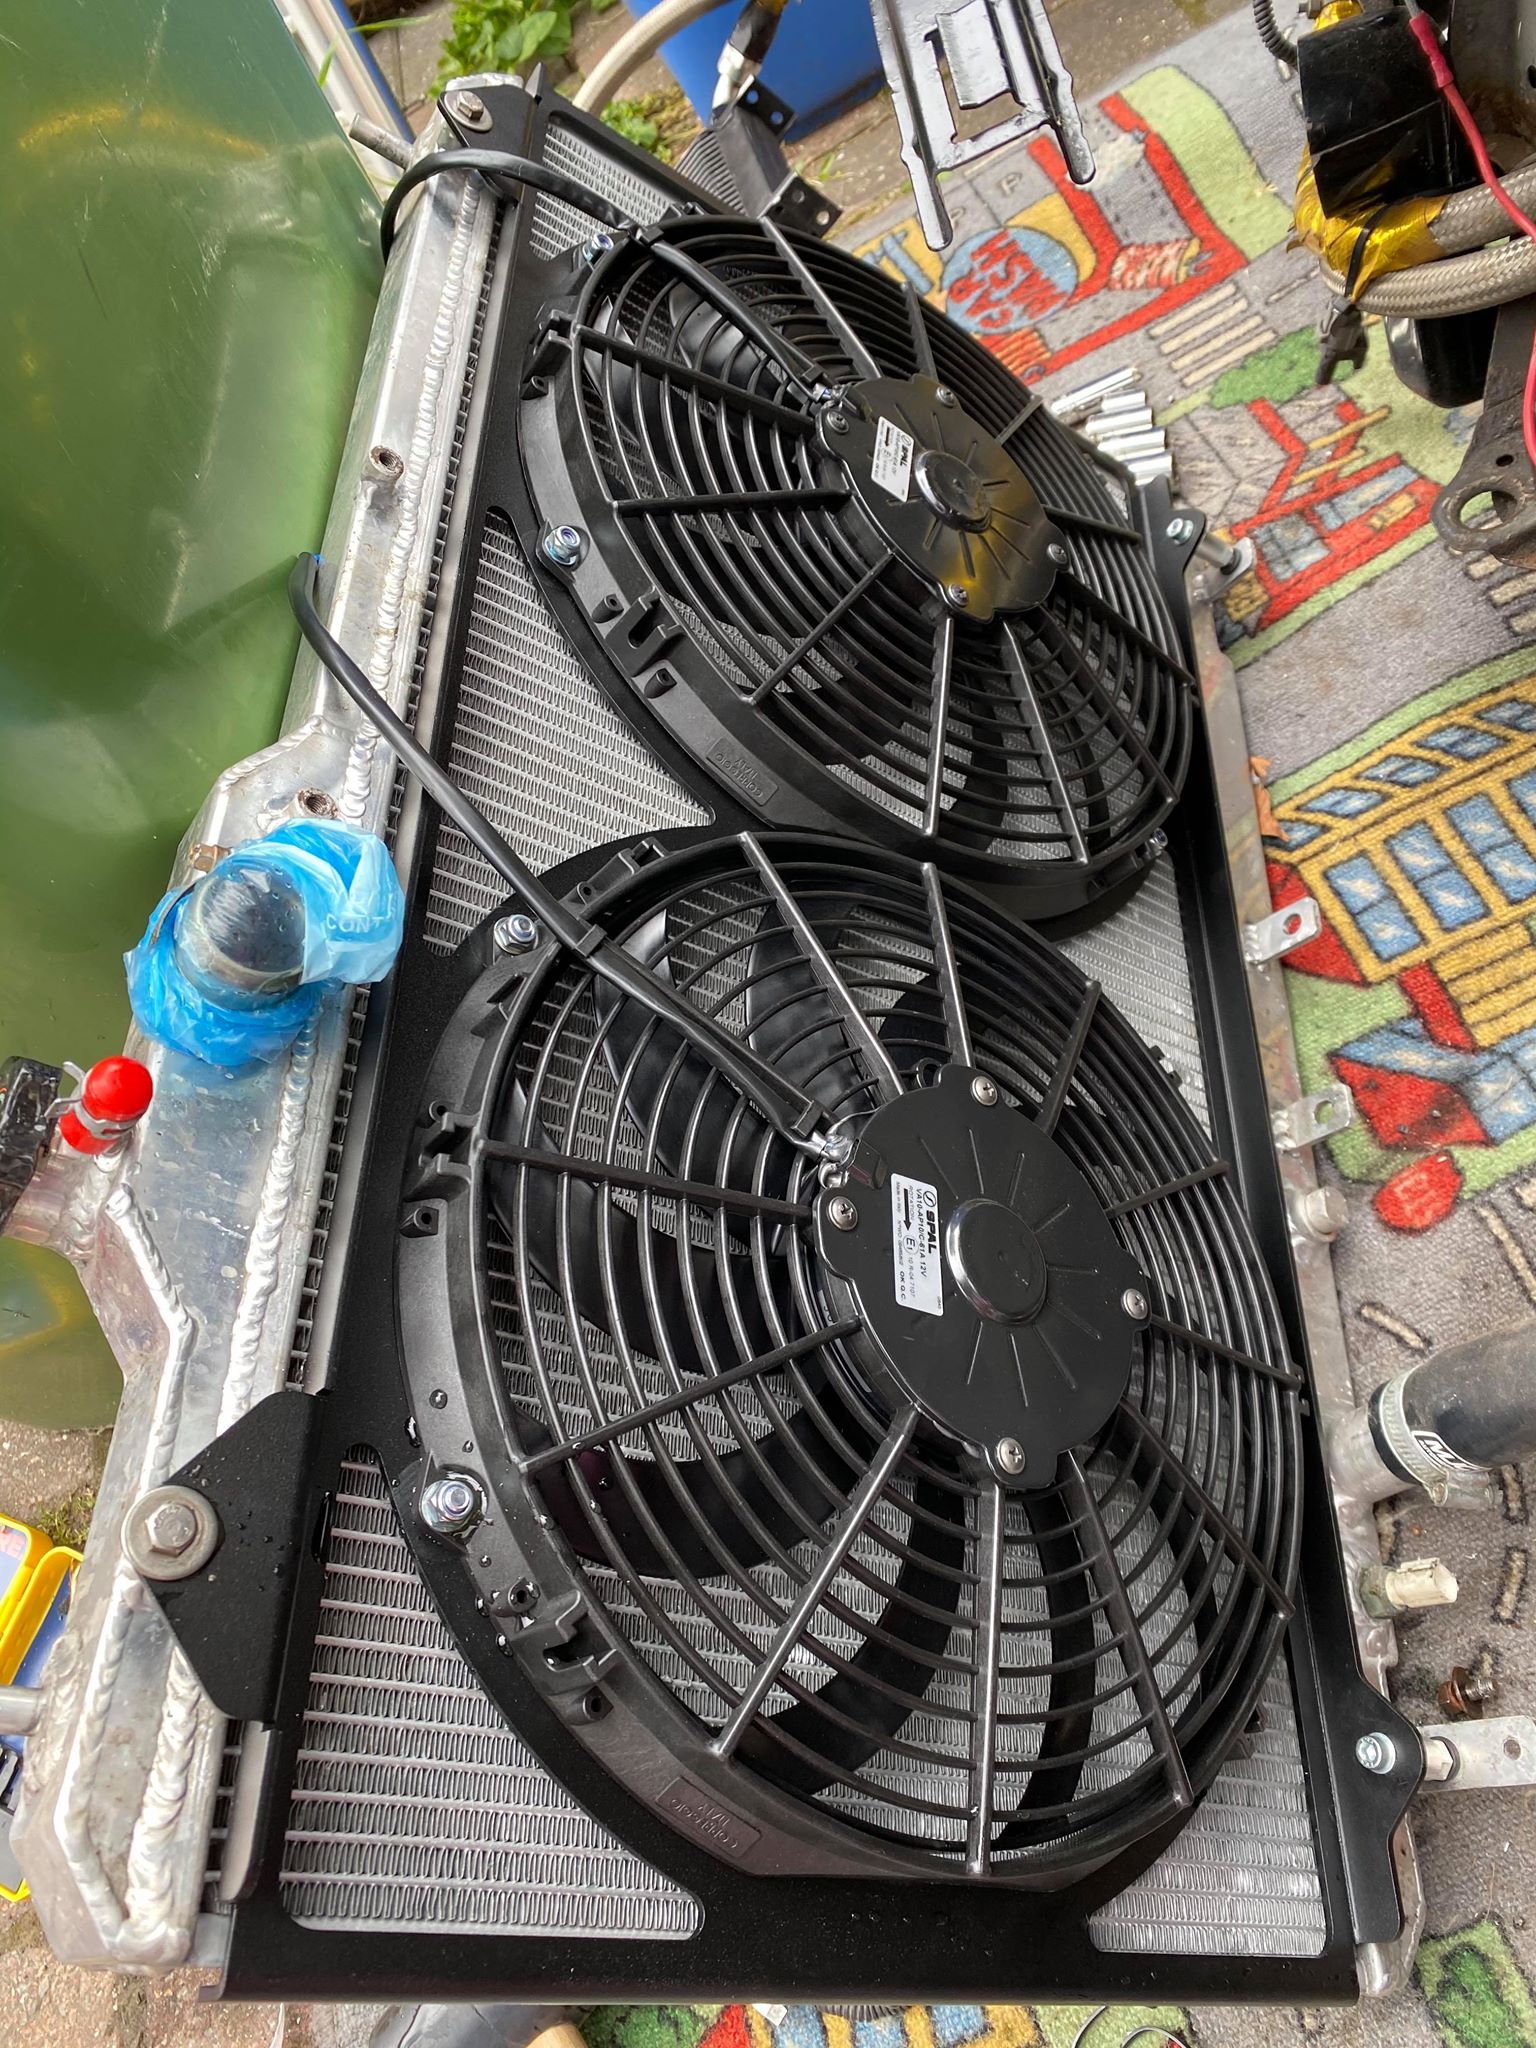
Step 2: Fit The Fans To The Shroud
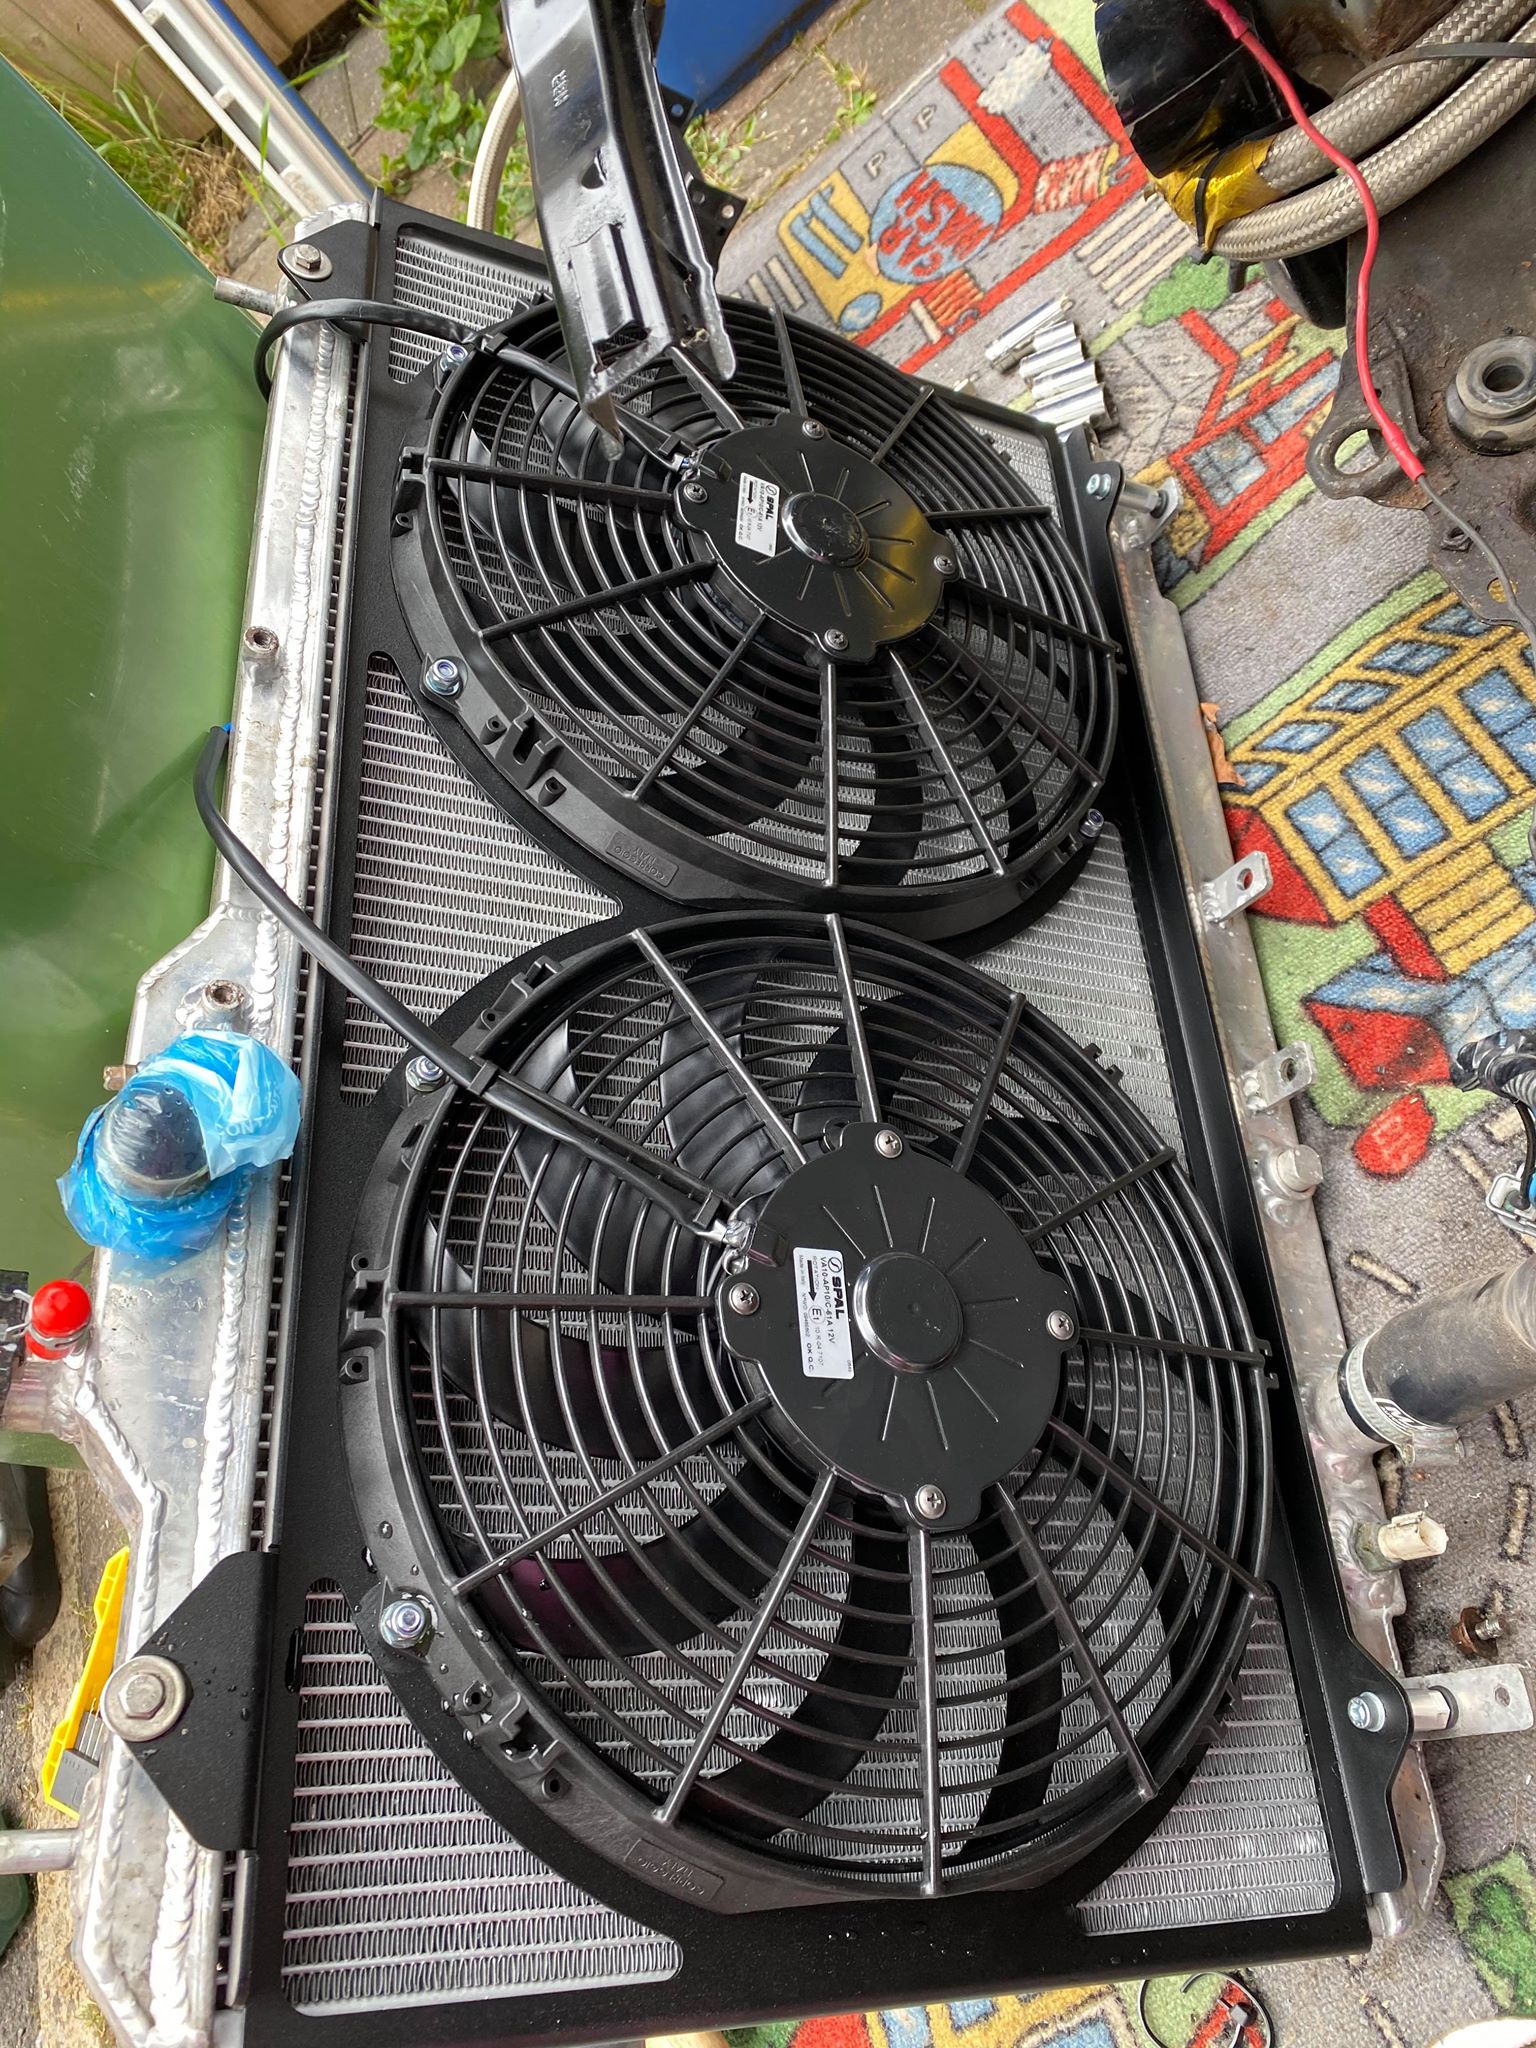
With the radiator out, fit the SPAL fans into the aluminium shroud. The lower tabs are the first part to sort. Fit the supplied O-rings and metal collars into the lower mounting holes, then bolt through the centre and tighten everything evenly.
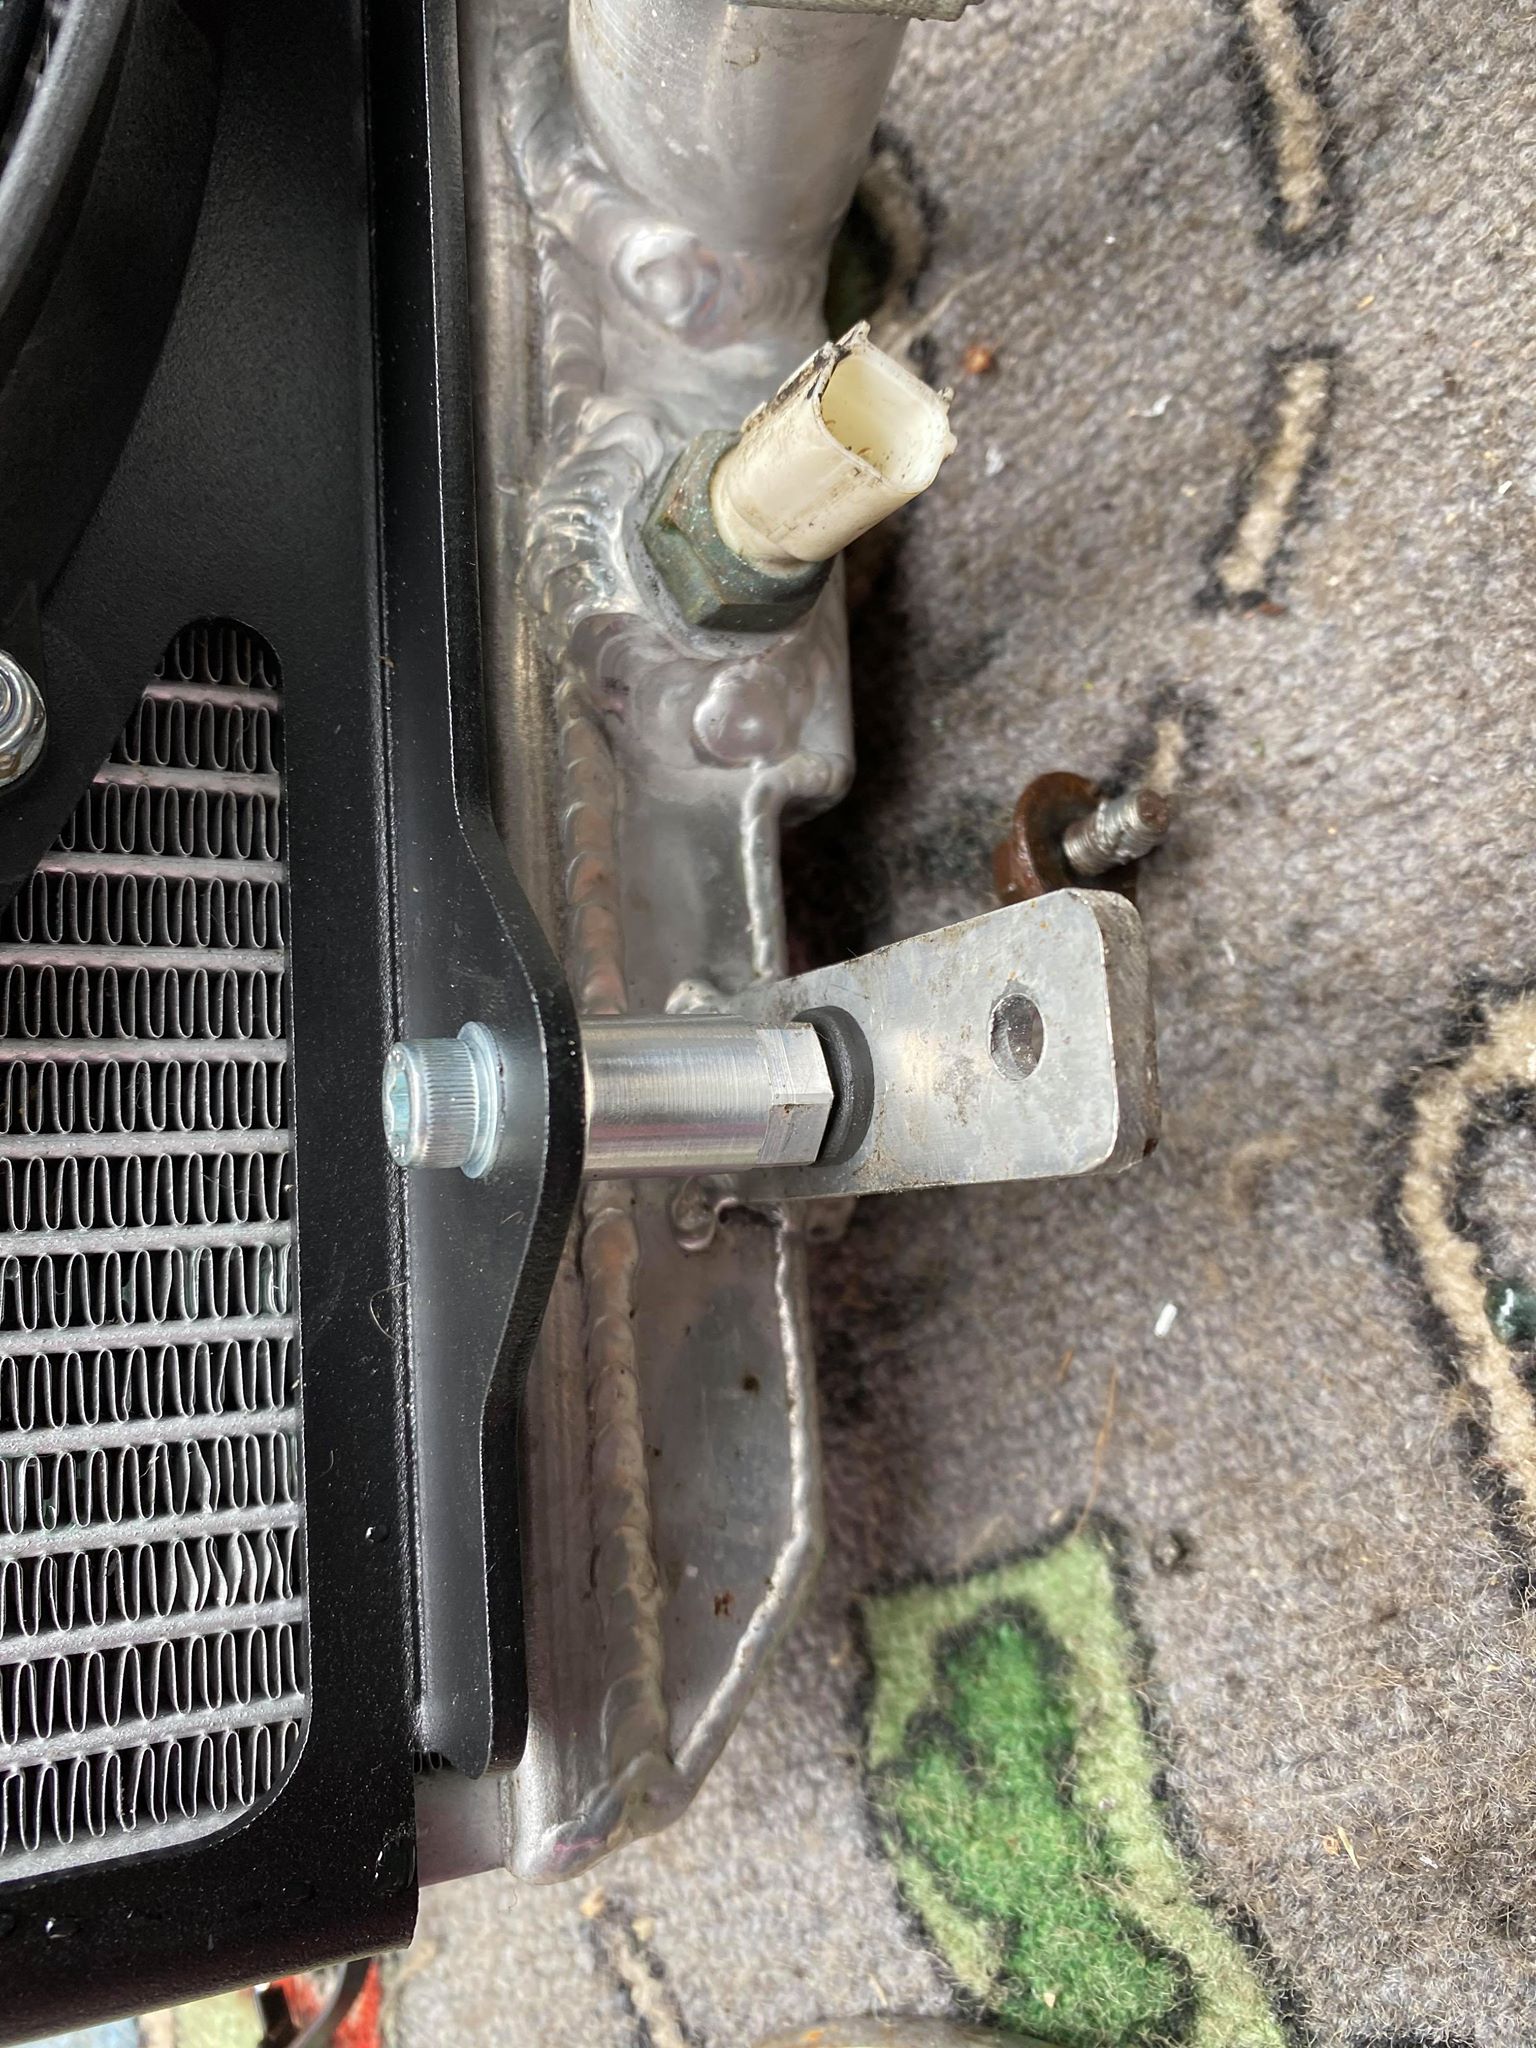
Once the lower tabs are located, the top mounts should line up and bolt into place. Do not fully commit everything until you are happy that the fan sits squarely, the shroud is flat against the radiator mounting points and nothing is touching the core.
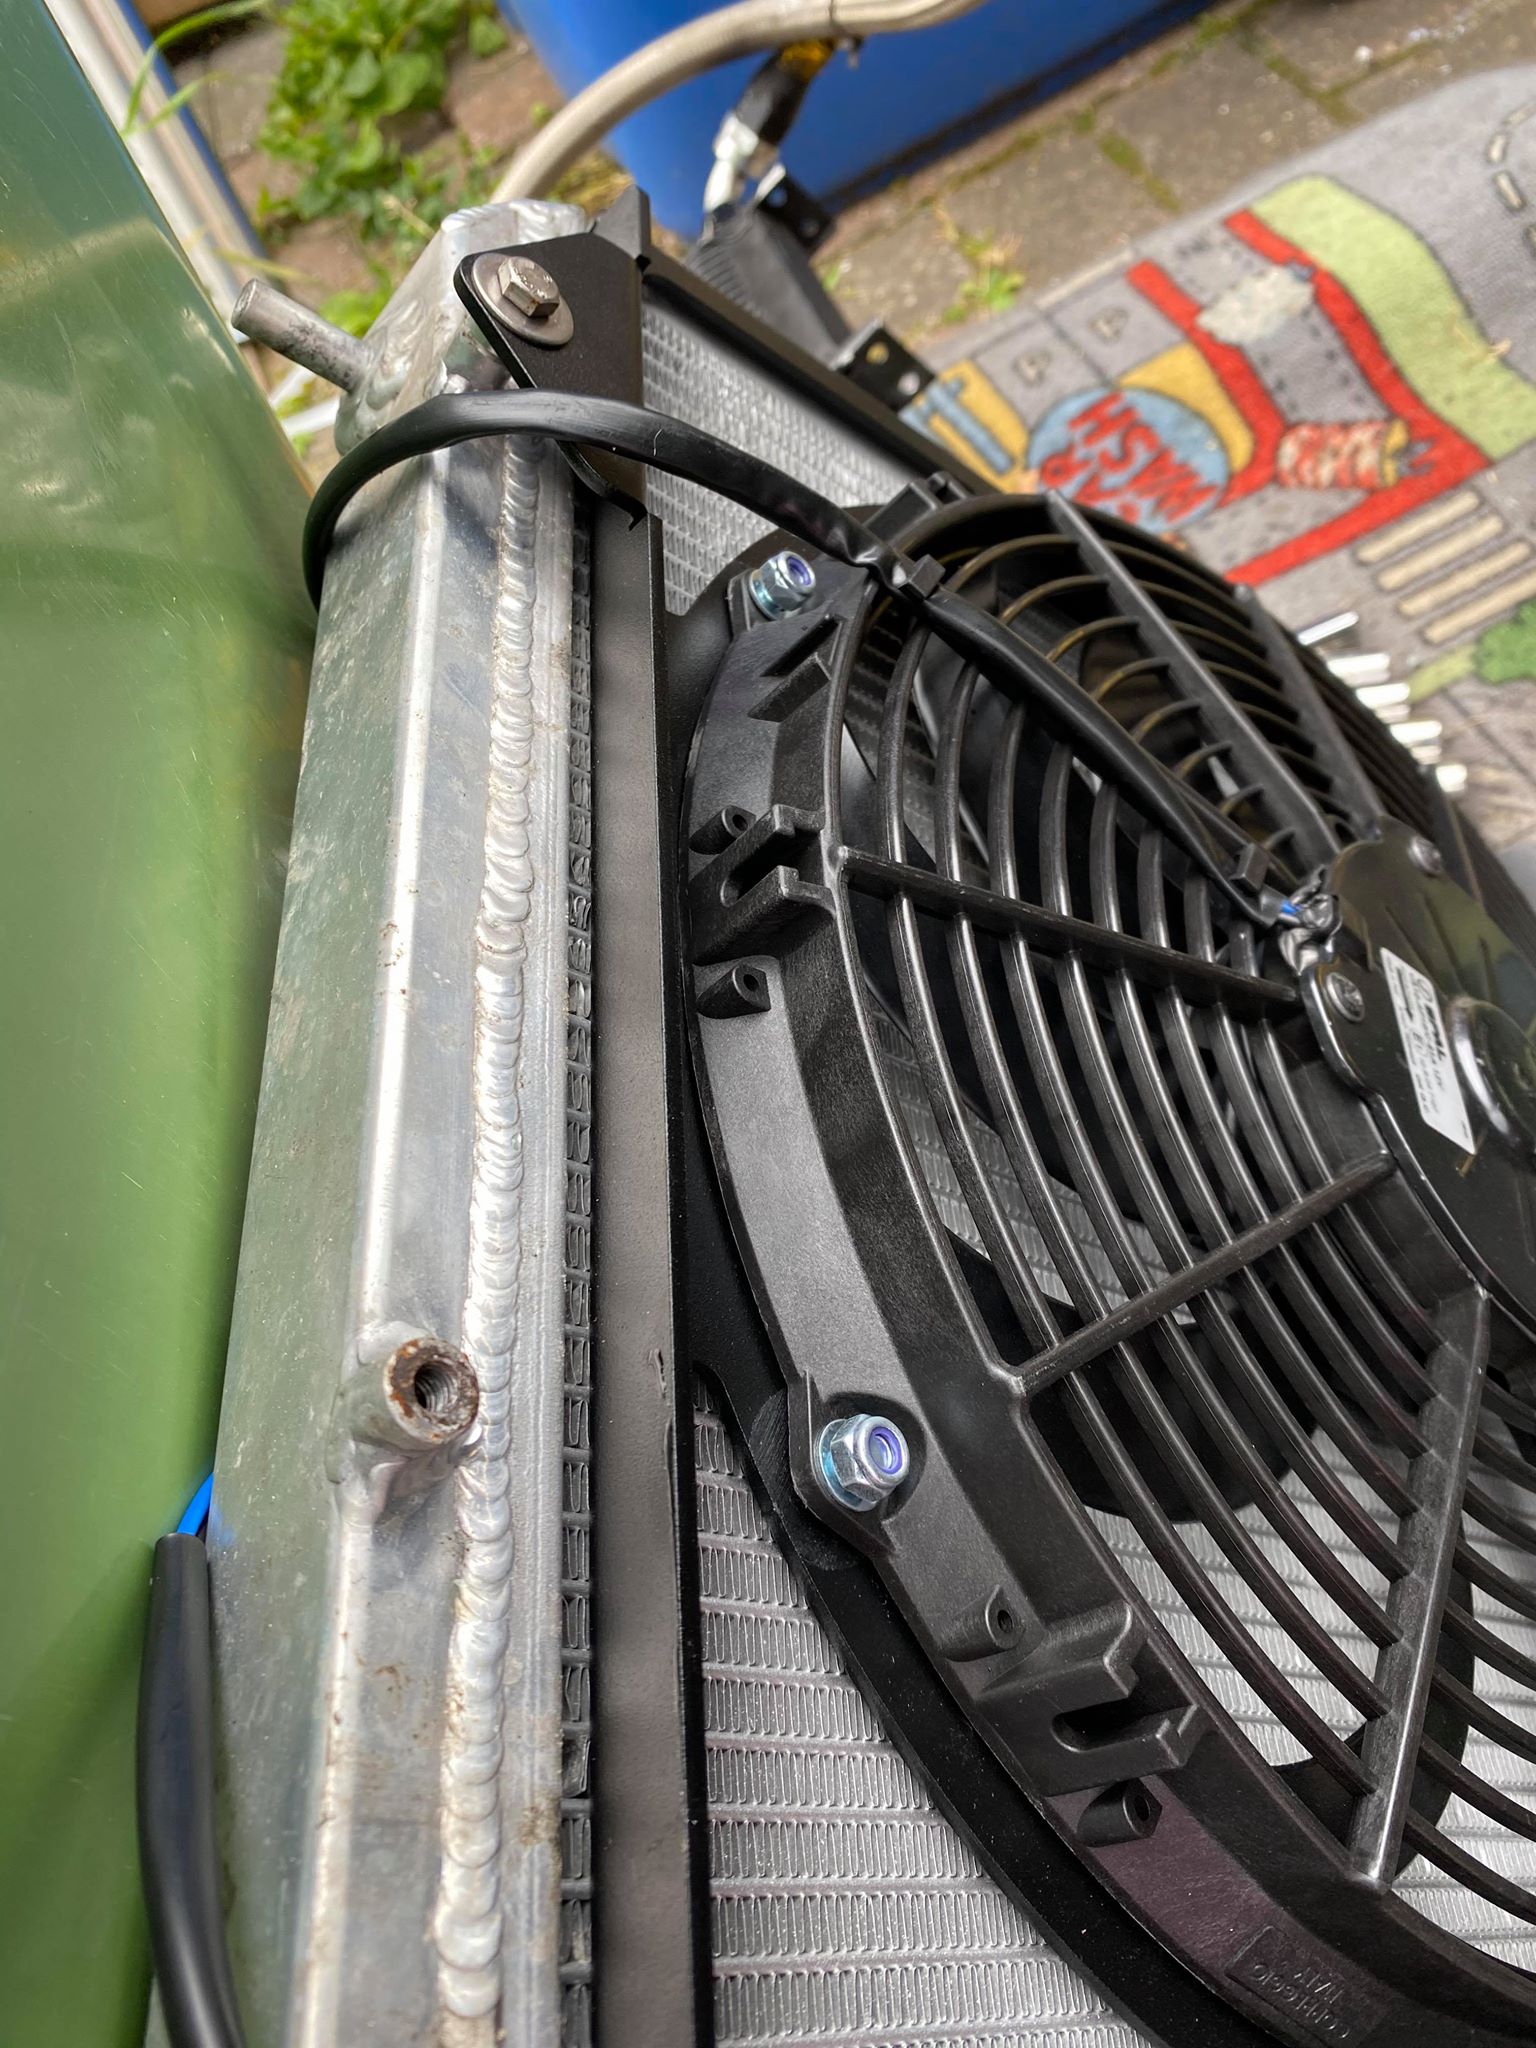
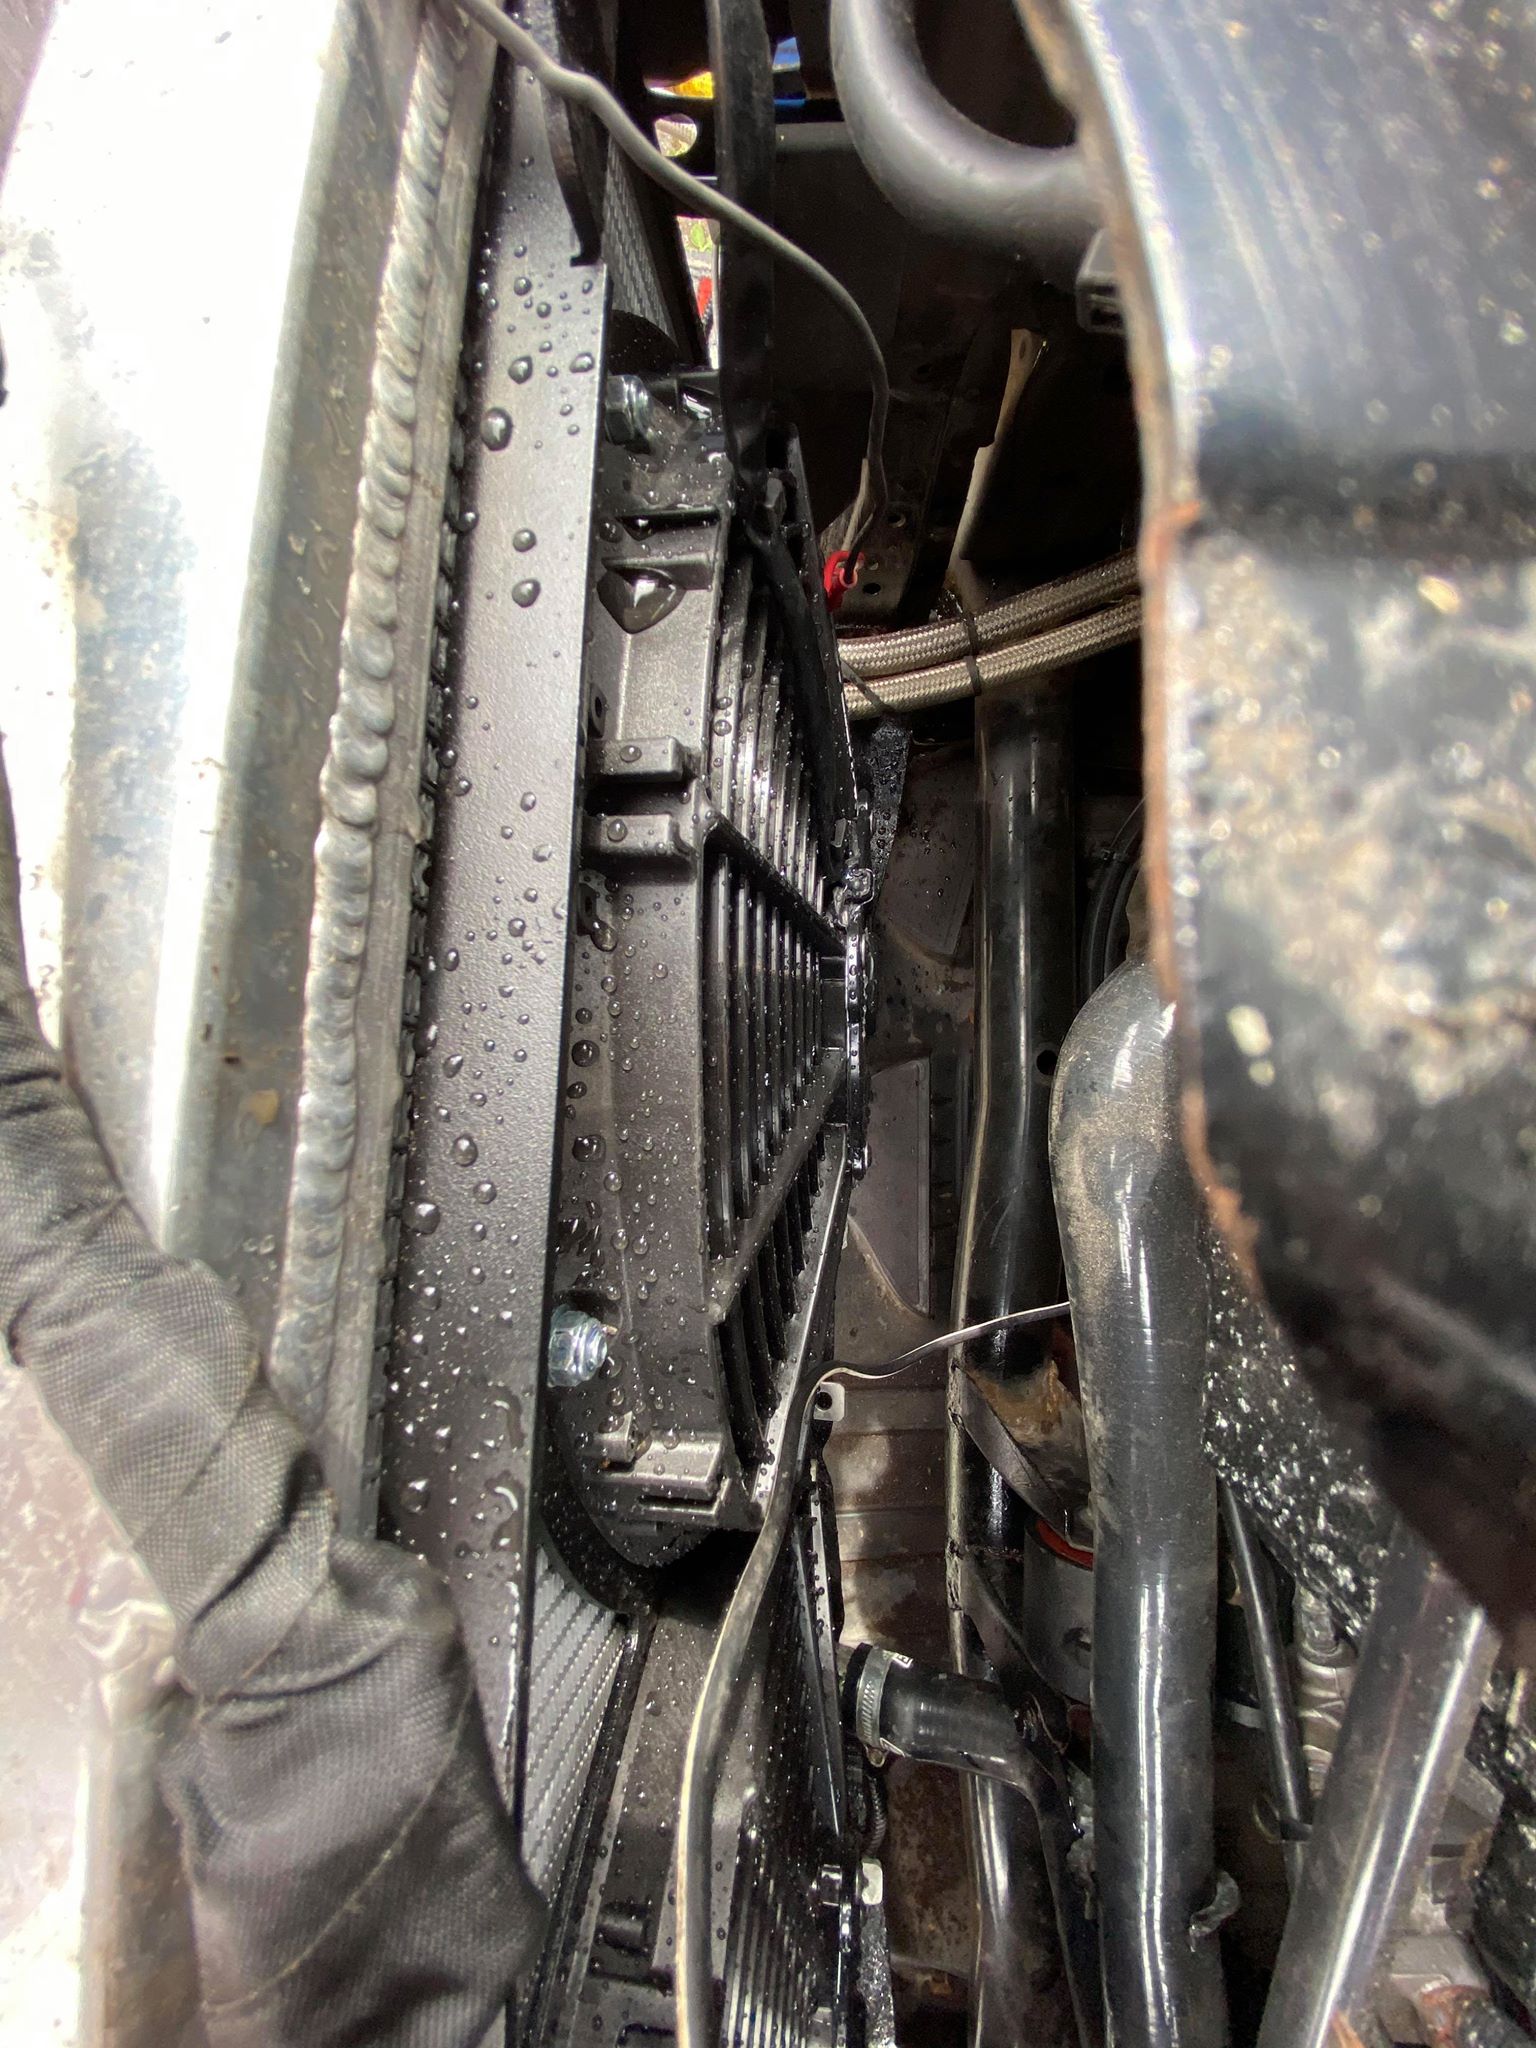
Step 3: Check Fitment On The Radiator
The install shown here was completed on a Tegiwa radiator. The original FN2 fans fitted that radiator without modification, and the shroud was designed around the same practical mounting approach.
Before refitting the assembly to the car, check that the shroud is mounted securely, the fan wiring exits in a sensible direction, and the fan blades have clear space to spin. A few minutes of checking here is much easier than finding a clearance issue after the radiator is back in the car.
The FN2 kit uses a slim, high-flow mounting design with SPAL fans. The expansion bottle or header tank may need modifying or replacing because the shroud does not have mounting points for the factory setup.

Recommended FN2 Fan Shroud Kit
If you are using this guide before ordering parts, the main product for this job is the FN2-specific 2442cfm fan shroud kit. It is designed for Honda Civic FN2 fitment and uses SPAL pull fans.
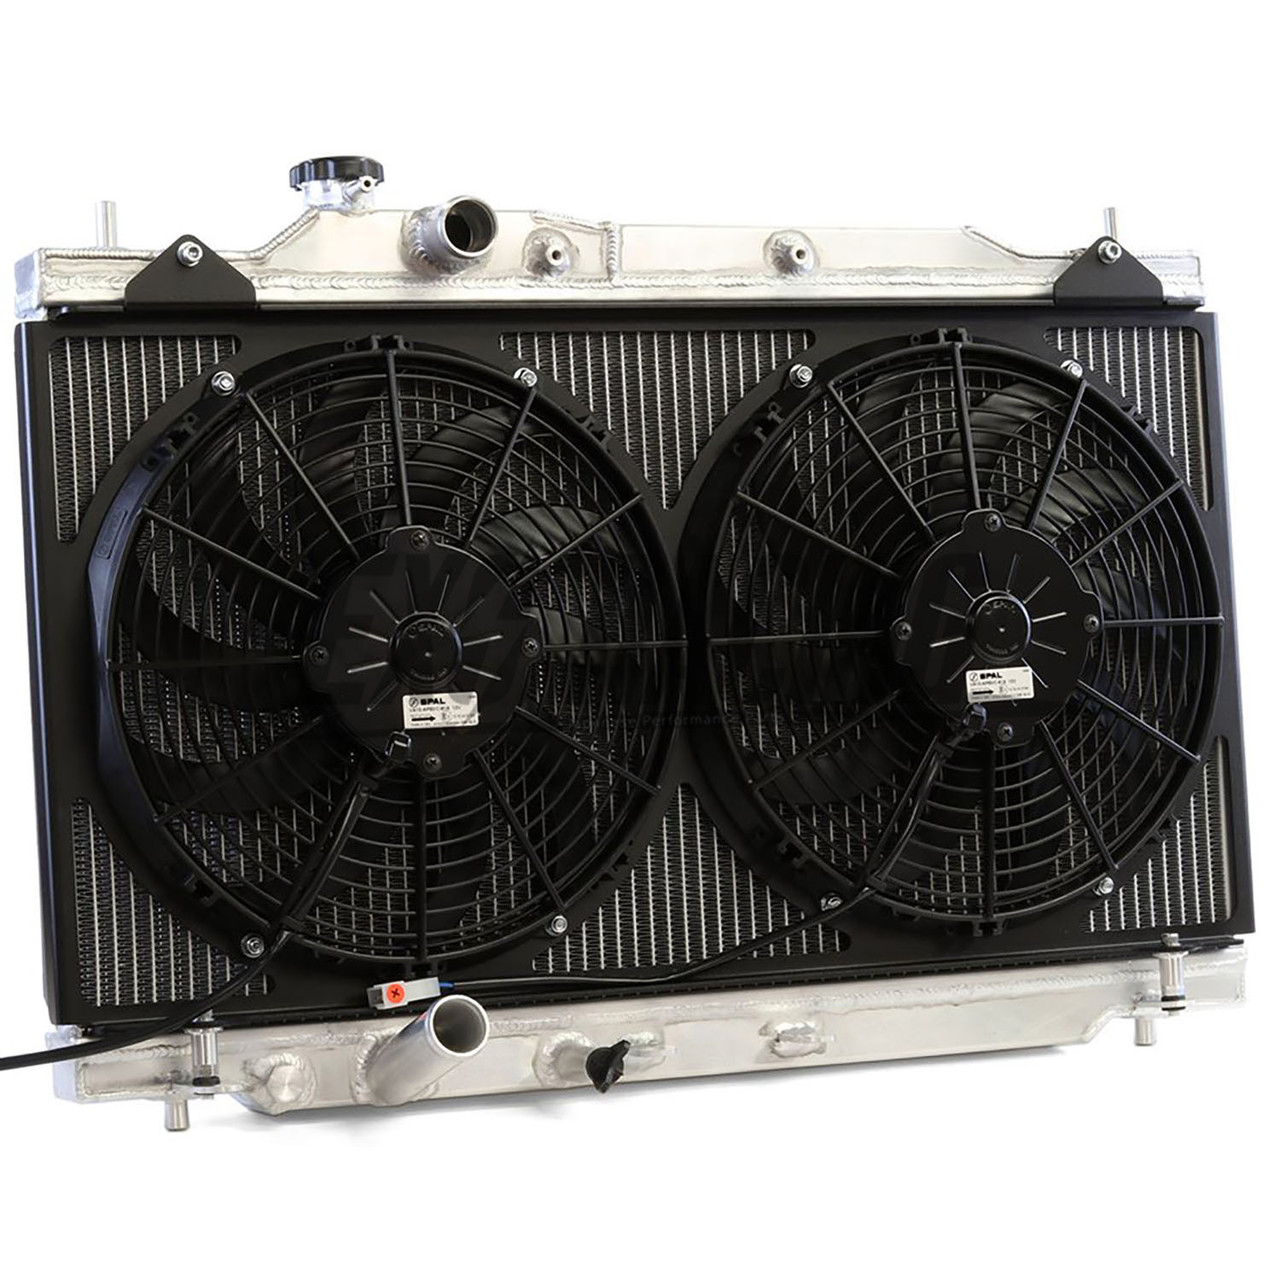 Radiator Fan Shroud 2442Cfm For Honda Civic Fn2
FN2-specific aluminium fan shroud kit with SPAL pull fans for fast road, track and tighter engine bay setups.
From £234.00
Step 4: Wire The SPAL Fans Correctly
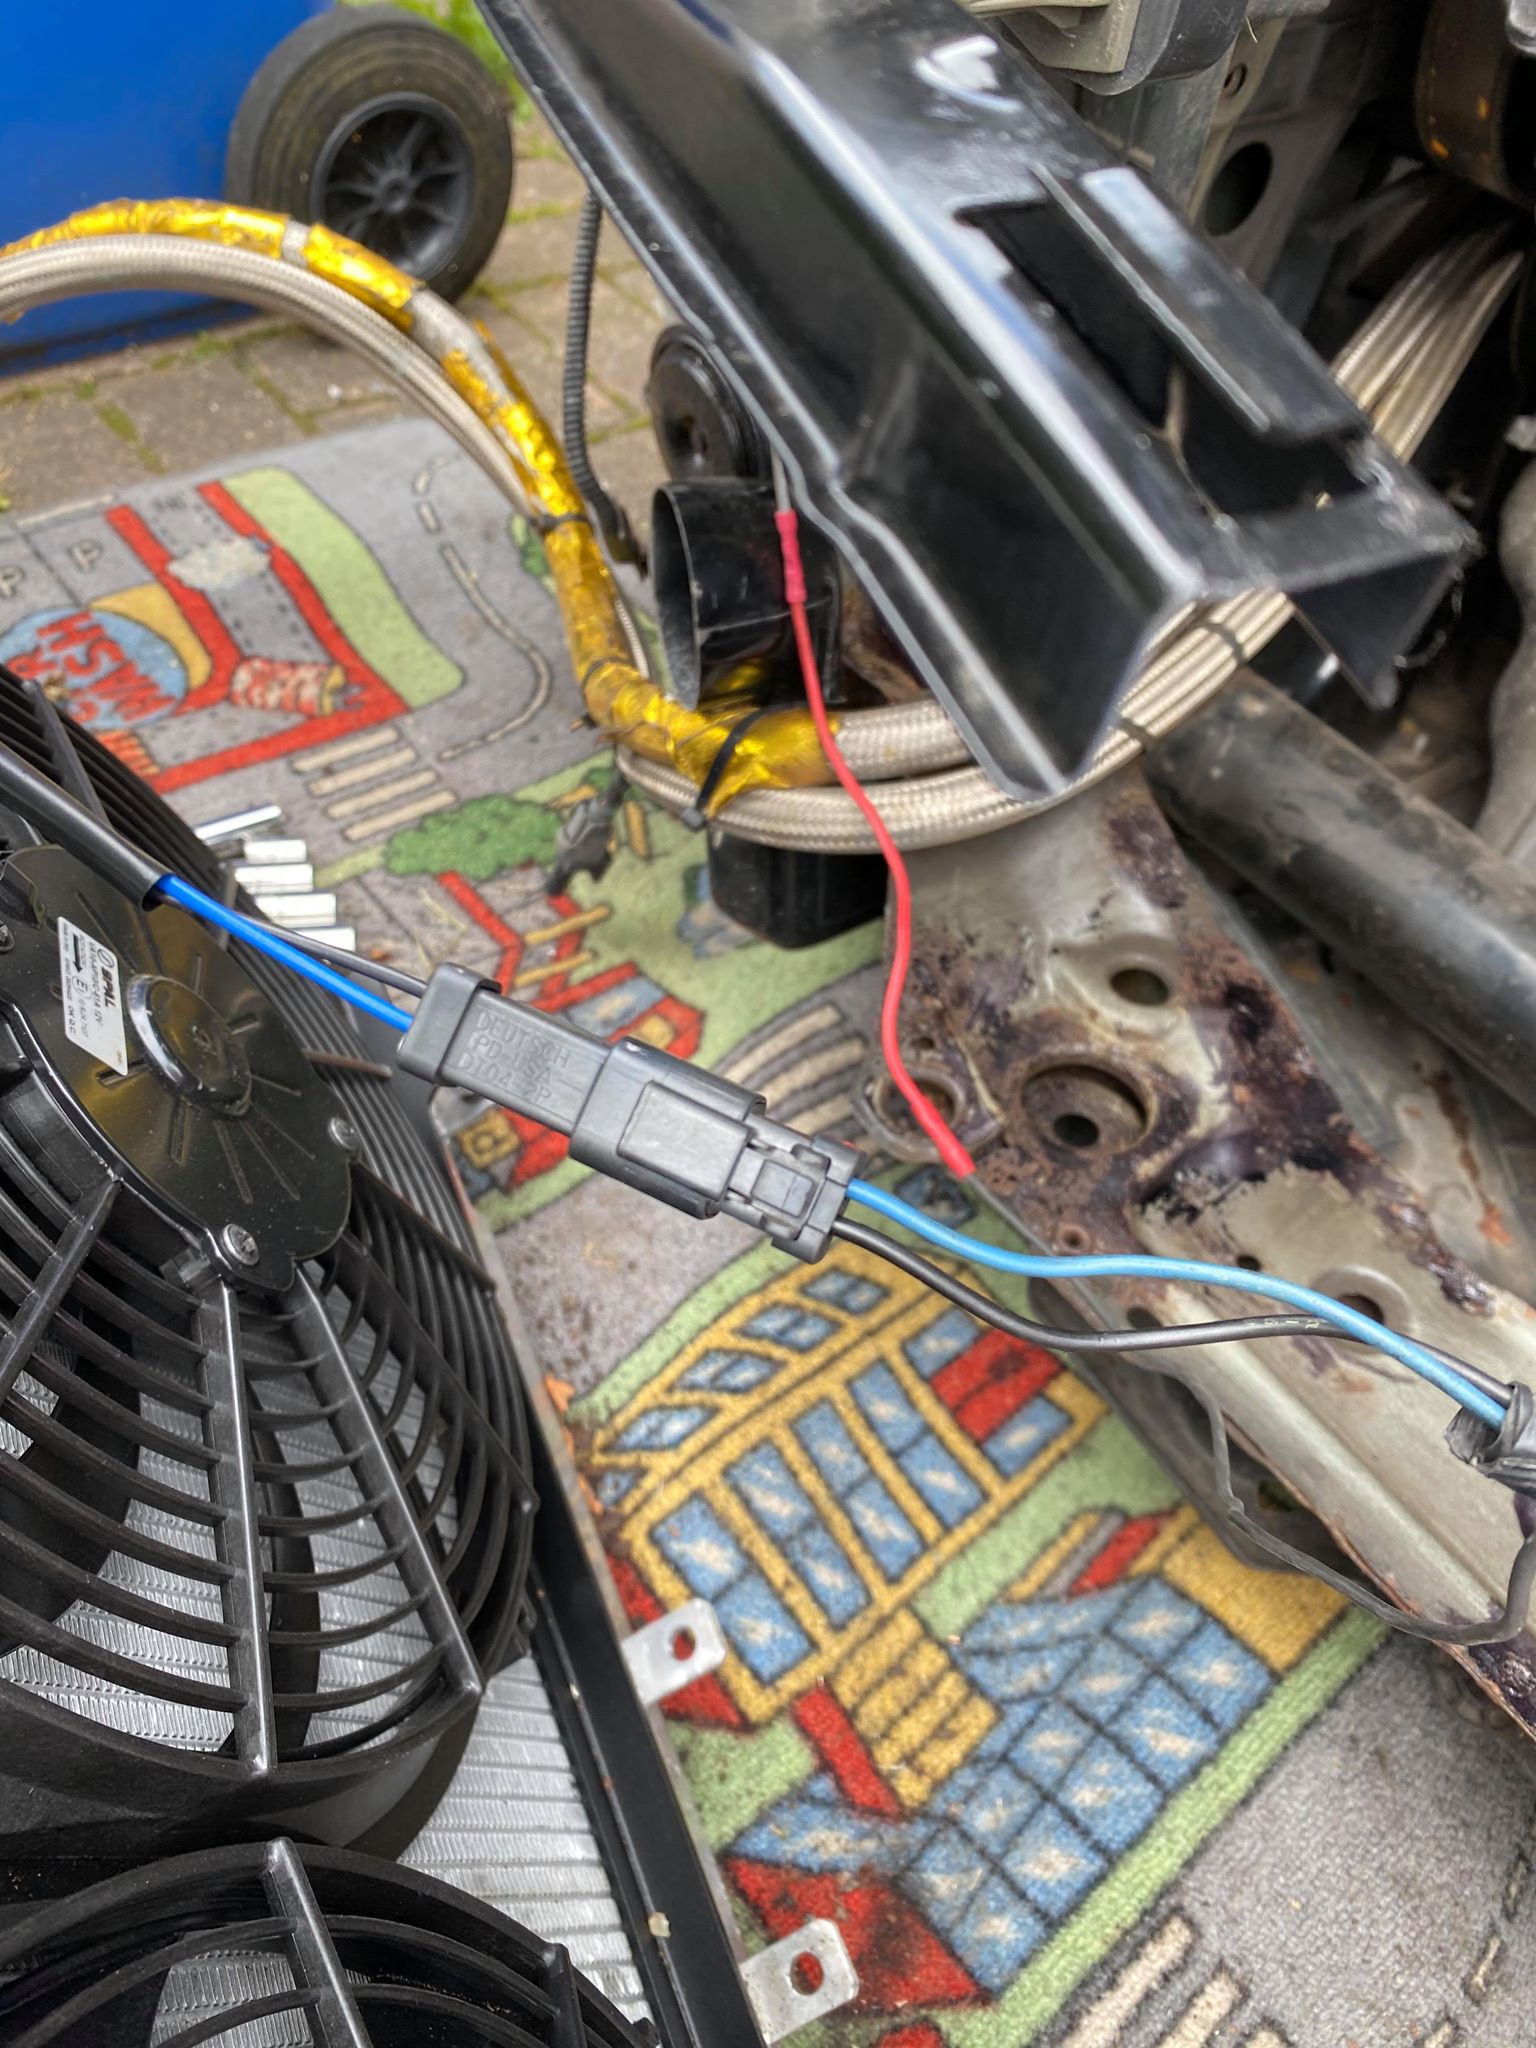
The electrical side is the most important part of the job. The SPAL fans come with two-pin white connectors, but the FN2 OEM loom is not directly compatible with those plugs.
On this install, the white SPAL connector and the original OEM connector were removed and replaced with waterproof Deutsch connectors. You can use another suitable waterproof two-pin connector, but the join needs to be secure, protected and suitable for an engine bay.
FN2 fan wiring polarity table
Brown = negative
Black = negative
Blue = negative
Black = negative
The passenger side fan is the secondary A/C fan. It will only run when the air conditioning is switched on, so do not assume there is a fault just because it does not run with the main radiator fan test.
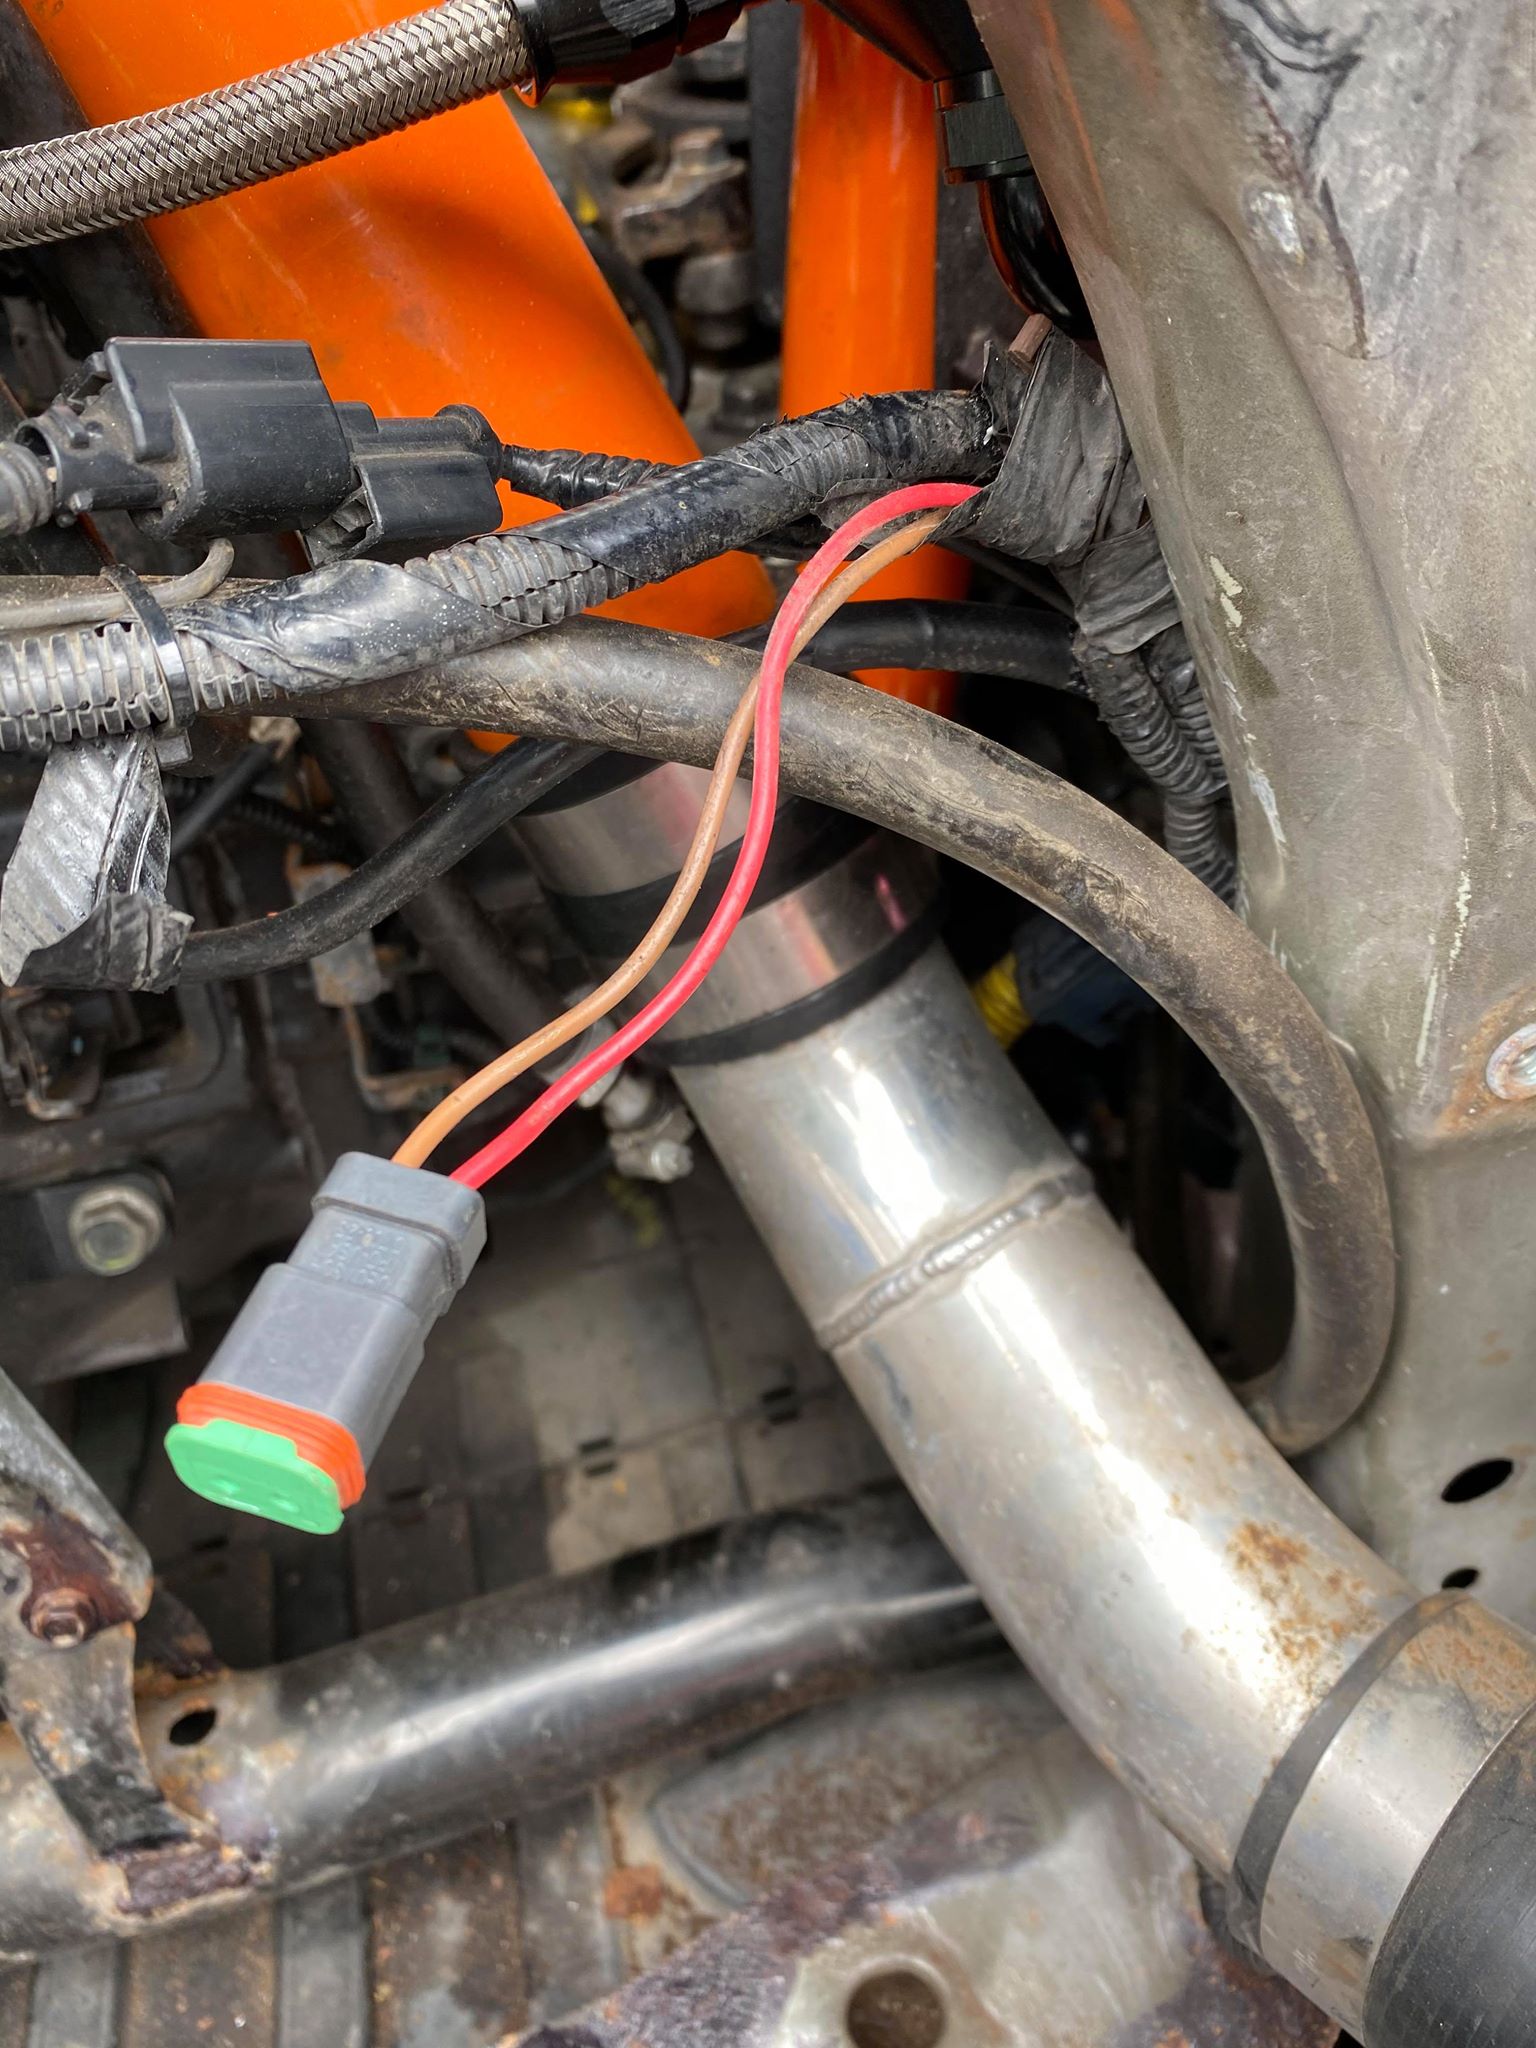
Protecting Fan Wiring From Heat
Once the fans are wired correctly, protect the loom before the radiator goes back in. This is especially important on turbocharged FN2 builds, supercharged cars, track cars, or any setup where the fan wiring runs near a manifold, downpipe, turbo pipework, hot coolant hoses or tight engine bay packaging.
Fan wiring does not need to touch a heat source to fail. Radiant heat from a nearby manifold or pipe can soften insulation over time, and vibration can then rub through the softened outer layer.
If the positive and negative wires short together, the fan can stop working, blow a fuse, damage the connector or leave the car overheating in traffic.
Our usual approach is to route the wiring away from the heat source first, secure it so it cannot fall onto anything hot, then protect the vulnerable section with silicone fibreglass heat sleeve where extra protection is needed.
- Keep fan wiring away from manifolds, downpipes, turbo pipework and sharp brackets wherever possible.
- Use P-clips, cable ties or proper loom routing so the wiring cannot drop onto the radiator fan, exhaust or hot coolant hoses.
- Sleeve only wiring that is in good condition. Do not cover melted, cracked or damaged insulation without repairing it first.
- Recheck the protected wiring after the first few heat cycles, because new routing can settle once the car has been driven.
If you are not sure what size sleeve to use, our heat sleeve size chart explains how to measure the wiring bundle properly. For fitting help, see our guide on how to install silicone fibreglass heat sleeve.
 Exoracing Silicone Fibreglass High Temperature Heat Sleeve 0.5m
Push-over heat sleeve for protecting fan wiring, sensor wiring, hoses and lines routed near hot engine bay parts.
From £14.99
Step 5: Refit, Fill And Test
Once the shroud is fitted and the wiring is ready, refit the radiator and fan assembly into the car. Reconnect the coolant hoses, radiator mounts, temperature sensor and fan wiring, then refill the cooling system if coolant was drained.
Run the car up to temperature and check for leaks. Let the fan cycle on, check the airflow direction, then switch the air conditioning on to confirm the passenger side fan behaves as expected.
Final Checks Before Driving
- Check every fan shroud mounting bolt is tight.
- Make sure the fan blades do not touch the radiator core, loom or surrounding parts.
- Confirm the radiator fan pulls air through the radiator and into the engine bay.
- Switch the A/C on and confirm the passenger side fan operation.
- Check for coolant leaks once the system is hot.
- Bleed the coolant system properly if the radiator has been removed.
- Recheck wiring and hose clearance after the first heat cycle.
Common FN2 Fan Shroud Fitting Mistakes
Getting the polarity wrong
This is the easiest mistake to make and the most important one to avoid. If the fan blows the wrong way, the car may still look like it has working fans, but the airflow will not be doing the job you need.
Thinking the passenger fan is faulty
The passenger side fan is for the air conditioning, so it will not behave exactly like the main cooling fan. Test it with the A/C switched on before diagnosing a wiring issue.
Not protecting the wiring
The wiring sits in a hot, vibrating engine bay. Use proper connectors, strain relief and loom protection so the repair lasts. If the car is turbocharged or has hot pipework nearby, check the route carefully after fitting.
Skipping coolant bleeding
If the radiator has been removed, trapped air in the system can cause temperature issues even if the fan shroud is fitted correctly. Bleed the system properly and recheck after the first drive.
Car Used In This Guide
This install was carried out on a modified Honda Civic Type R FN2 GT. The car used a Tegiwa radiator, a turbo setup and the 2442cfm fan shroud kit, which makes it a useful example for owners working with tighter packaging and higher heat load than a standard road car.
- Honda Civic Type R FN2 GT.
- 629.9 bhp and 448.3 ft/lb.
- TDI North turbo kit with Garrett GT30.
- Tegiwa radiator.
- 2442cfm fan shroud kit.
We have kept the spec list short here so the guide stays focused on the fitting job. The important point is that the car is not a gentle standard example; it is a high-power FN2 where cooling, clearance and wiring reliability matter.
Frequently Asked Questions
Does the FN2 fan shroud fit the OEM radiator?
The FN2 kit is designed for Honda Civic FN2 fitment and uses the original fan mounting locations. Always check your radiator setup before ordering, especially if the car has an aftermarket radiator, custom mounts or modified coolant routing.
Does it fit a Tegiwa radiator?
The install shown here was completed on a Tegiwa radiator where the OEM fans fitted without modification. That makes it a useful reference point, but you should still test fit the shroud and confirm clearance on your own car.
Which way should the FN2 radiator fan blow?
The radiator fan should move air through the radiator and into the engine bay. If the polarity is wrong, the fan can spin the wrong way and push air in the wrong direction.
Why does one FN2 fan only work with the A/C on?
The passenger side fan is the secondary fan for the air conditioning system. It will not always run with the main radiator fan, so test it with the A/C switched on before assuming there is a fault.
Do I need to cut the OEM wiring?
The SPAL fans use their own two-pin connectors, so the original loom will usually need adapting. On this install, both sides were converted to waterproof Deutsch connectors. If you are not confident with automotive wiring, ask a competent technician to handle this part.
How long does the FN2 fan shroud install take?
The original install took around 1.5 hours, but allow longer if you are working on axle stands, replacing connectors properly, bleeding coolant carefully or dealing with modified engine bay packaging.
Conclusion
Fitting an upgraded fan shroud to a Honda Civic FN2 is not a complicated job mechanically, but the wiring and testing need proper attention. The shroud itself bolts up cleanly, the lower tabs use the supplied O-rings and collars, and the SPAL fans are straightforward to mount once everything is lined up.
The most important checks are fan polarity, A/C fan behaviour, coolant bleeding and clearance around the radiator core. Get those right and the finished setup gives a cleaner, slimmer fan package with more engine bay room than the large OEM fan assembly.
You can view the Honda Civic FN2 2442cfm fan shroud kit, browse our wider radiator fan shrouds, or contact us if you need help checking fitment for your setup.