
How to Install a Weldable Exhaust Heat Shield
Posted by Matthew Marks on 13th Aug 2026
How to Install the Exoracing Weldable Exhaust Heat Shield
Templates, tight bends, stainless overlaps and spot welding—see how we tackled each stage on our AWD turbo Civic.
We would class this as an advanced fabrication job: you need to measure carefully, handle the thin stainless safely and use a suitable resistance spot welder.
When we made the downpipe and screamer-pipe shields for our Civic, we filmed the process.
The template shapes and welder setup took the most trial and adjustment, so we turned the video into a step-by-step guide to show what worked before you cut your own material.
our exhaust may differ, but the same template, fitting and welding method applies.
Watch: How to install the Exoracing weldable exhaust heat shield on a downpipe and screamer pipe
If the player is blocked, watch the weldable heat-shield installation on YouTube.
Tools and materials you need
The Exoracing DIY Weldable Exhaust Heat Shield Kit contains a 1000 mm × 600 mm sheet of embossed 0.1 mm 304 stainless steel, a matching sheet of 4 mm adhesive-backed insulation and two stainless Exoracing logo plates. Cutting, forming and welding tools are not included.
- Paper or thin card for the template
- Marker pen, ruler and tape measure
- Suitable scissors for the paper and insulation
- Suitable metal-cutting and forming tools
- Cut-resistant gloves and eye protection
- A suitable resistance spot welder and a small scrap piece for setup checks
- Cleaning and degreasing materials that are safe for the job
- Suitable ventilation, fire controls and a clear work area
Before you start
- Remove the exhaust part from the car where practical and let it cool fully.
- Clean the part and identify every flange, sensor, joint and access point that must remain clear.
- Wear cut-resistant gloves and eye protection when cutting and forming the 0.1 mm stainless.
- Keep fuel, batteries, wiring, trim, cleaning vapour and other flammable materials away from the welding area.
- Use suitable ventilation or extraction and follow the welder manufacturer's instructions. See the HSE's welding-control guidance.
1. Make the paper template on the bare downpipe
Mark where the shield should start and finish, leaving a clearance gap of a few millimetres from each exhaust flange. Shape the paper around the bare downpipe and check the fit before cutting any insulation or stainless.
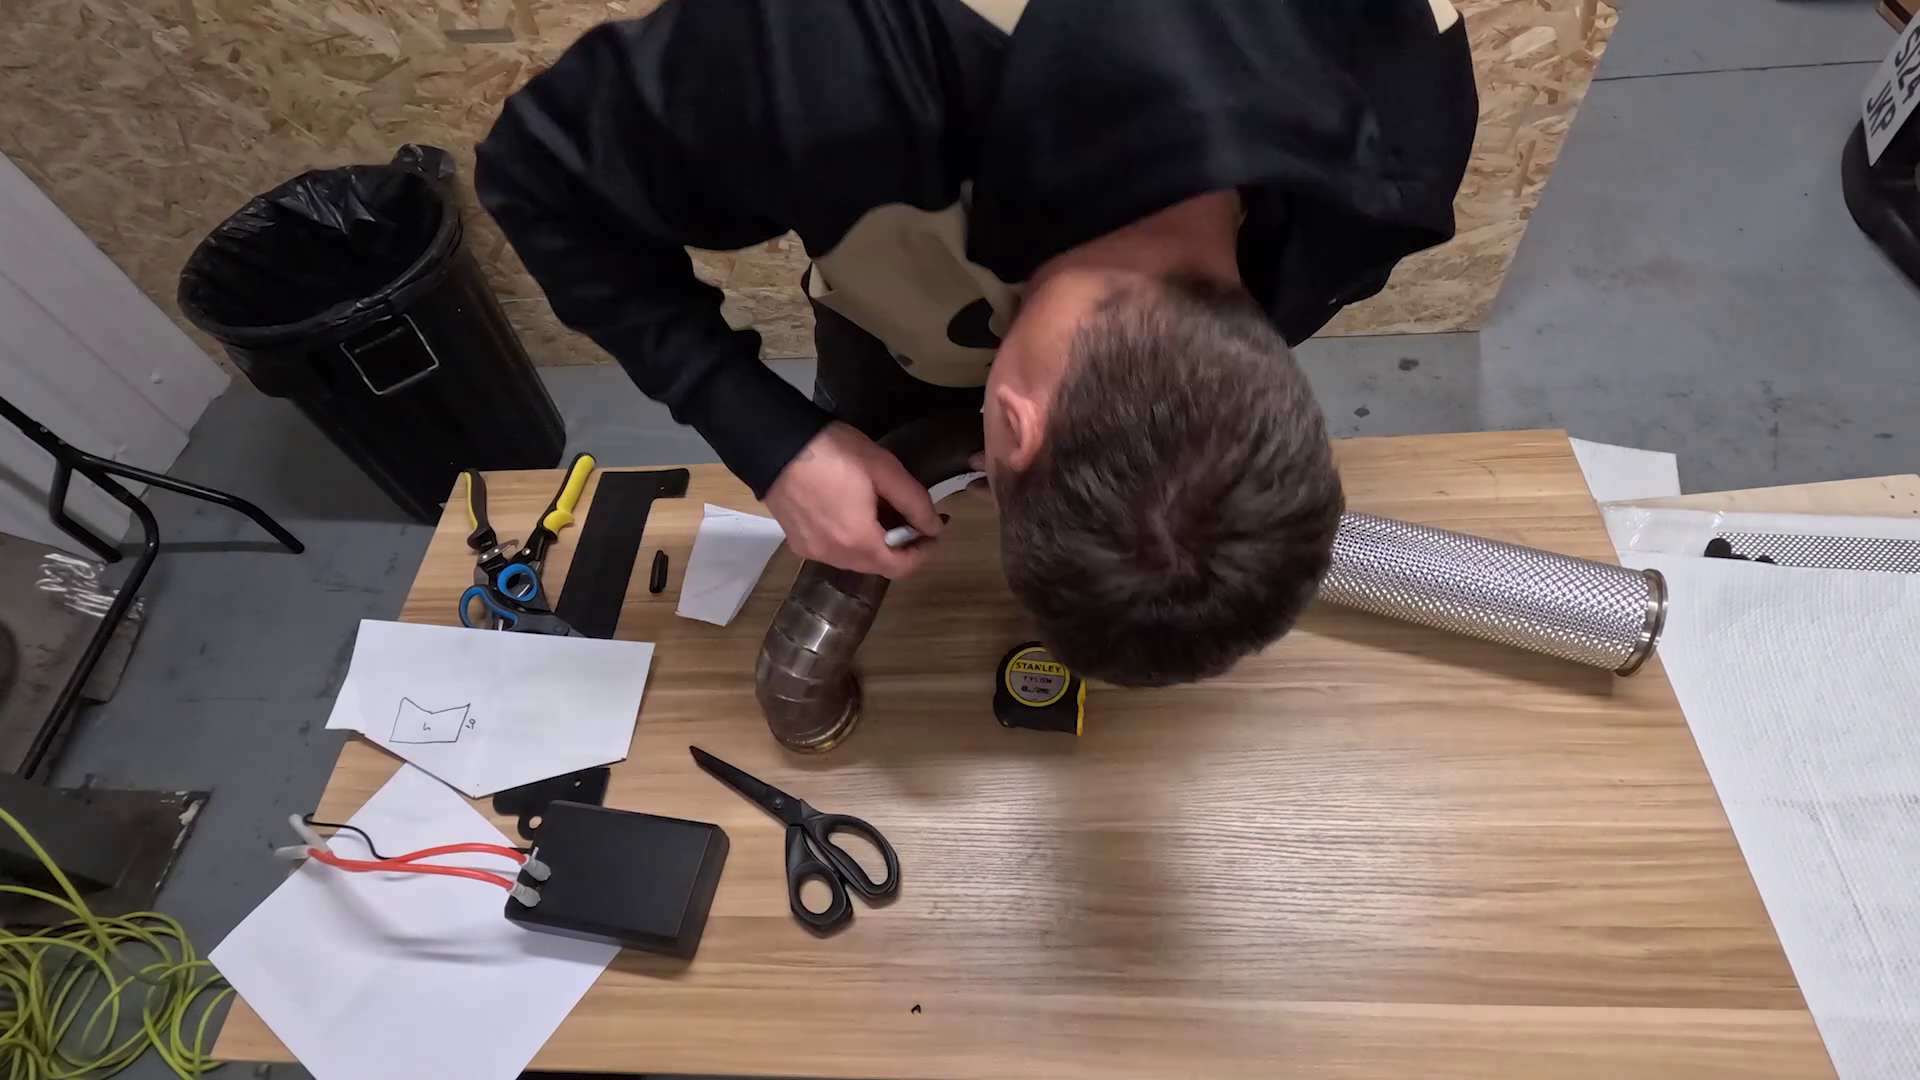
Tight bends take time. Think of each pie-cut bend as if you were flattening its surface onto the paper. On our Civic parts, curved diamond-shaped sections worked well around the bends. Build and refine one section at a time instead of forcing one large sheet to follow every change in direction.
If one paper piece will not sit flat, split the pattern into smaller pieces and join them. A clean paper pattern is much cheaper to correct than a badly cut stainless section. This stage was slow on our build, but it was worth the time for a neater finished shield.
2. Transfer the template to the insulation
Once the paper pattern fits, transfer the shape to the insulation and cut it out. Thoroughly degrease the exhaust surface and let it dry completely. Remove the full release liner from each insulation section, press it firmly onto the exhaust and make sure its edges meet cleanly.

Keep the insulation clear of flanges, sensors, joints and other service points. It must also finish short of each planned stainless seam so the two stainless layers can overlap directly and sit flat.
3. Cut and form the stainless outer skin
Use the checked paper pattern to mark the embossed stainless. Wear cut-resistant gloves. The 0.1 mm stainless is thin, and its cut edges are very sharp.
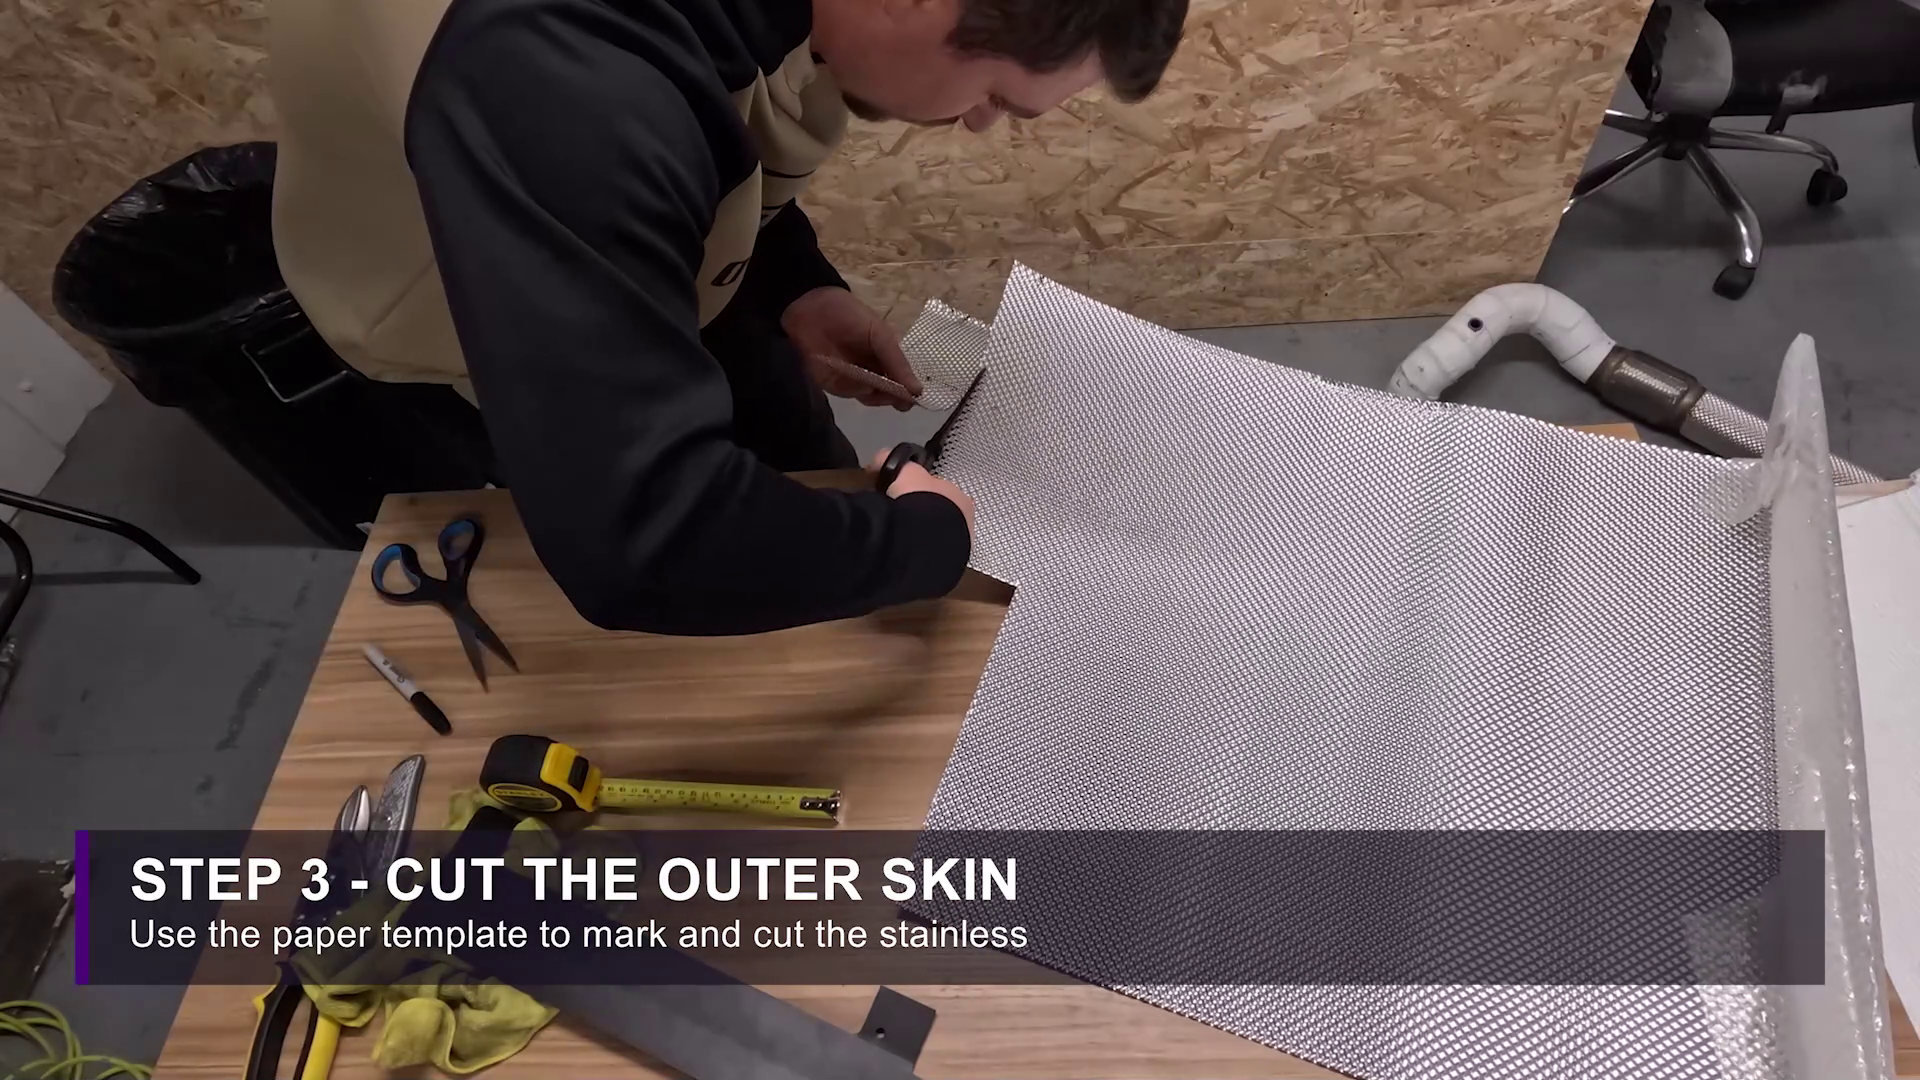
Cut the section carefully, then form it around the insulated downpipe a little at a time. Do not try to force the full curve in one move. Gradual forming gives you more control and makes it easier to correct a tight spot before welding.
4. Check the fit and overlap
Keep checking the overlap while you form each section. It should lie flat without lifting the shield away from the pipe or leaving the insulation loose underneath.
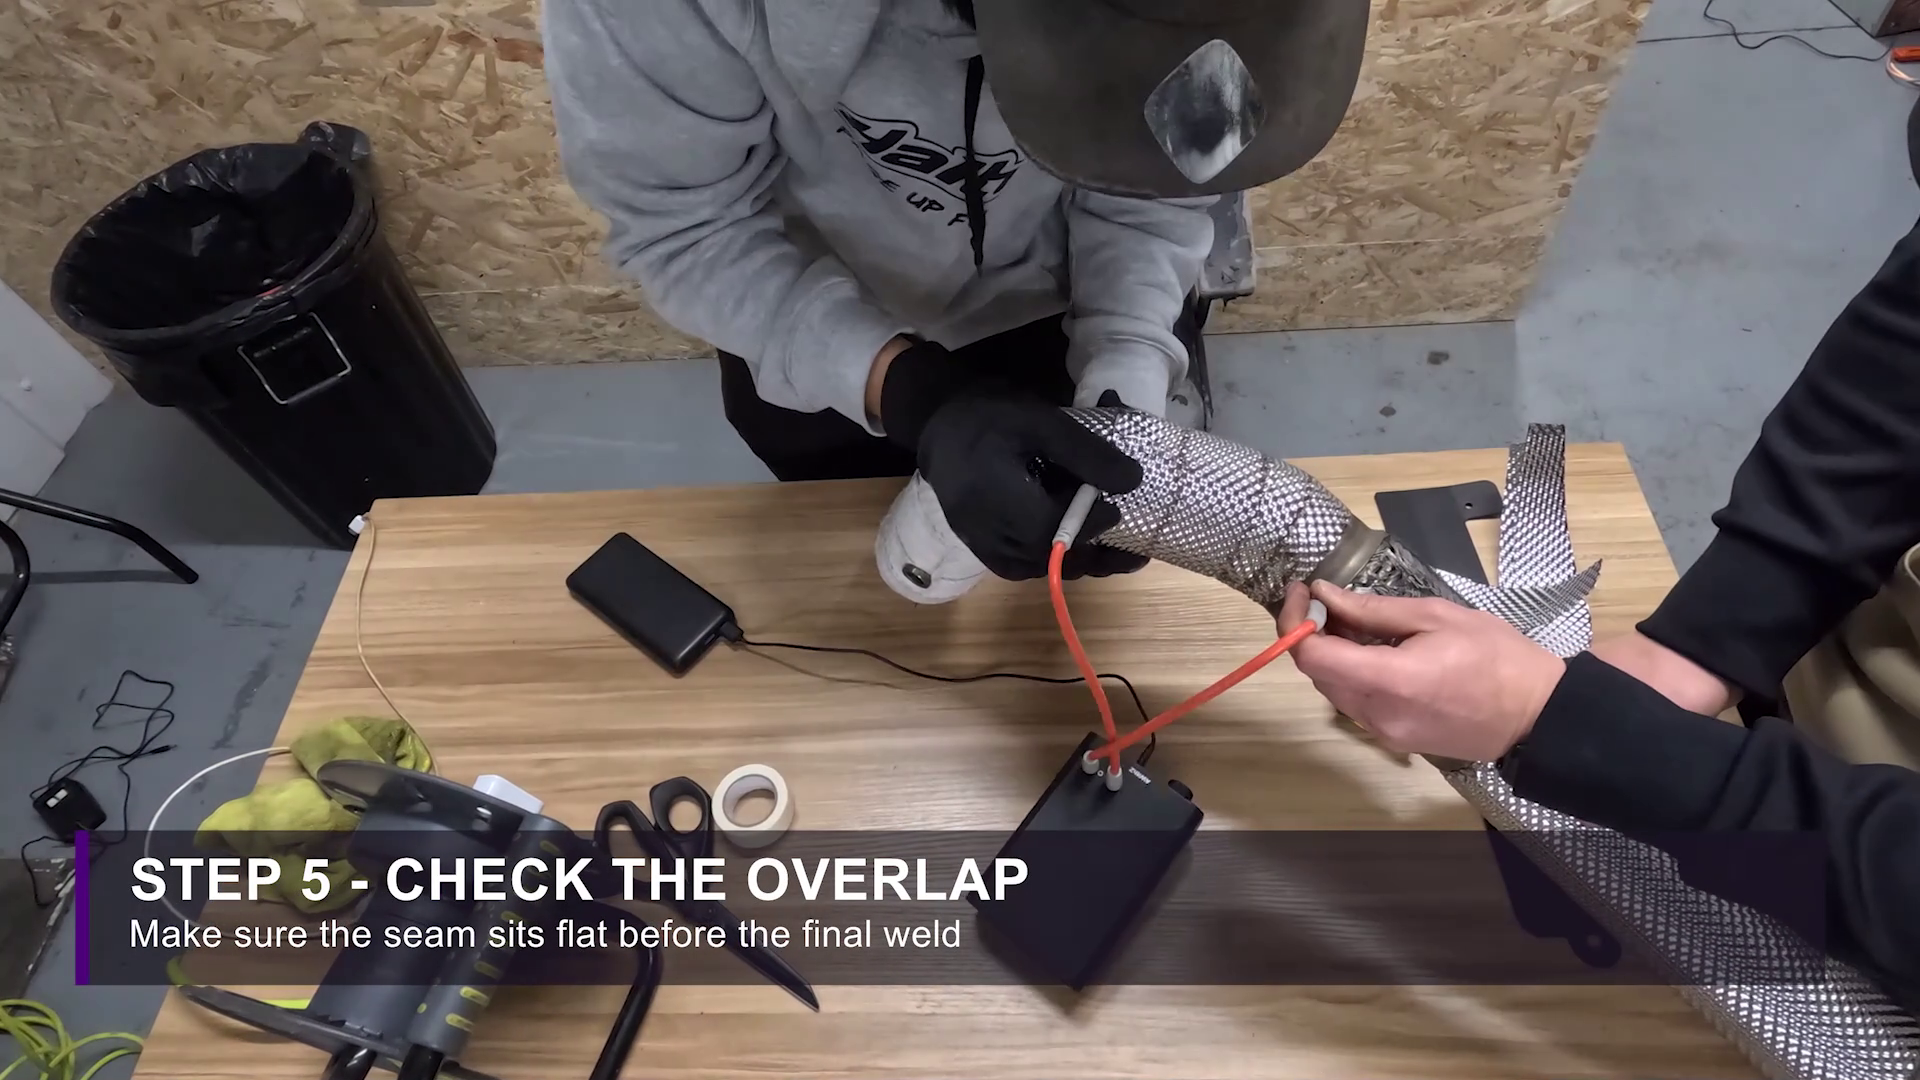
Allow approximately 20 mm of stainless overlap at each welded seam. Check the fit on the actual component before welding; tight curves may need smaller pieces and extra care to keep the seam flat.
5. Tack, spot weld and inspect the seam
Set up the resistance spot welder according to its manufacturer's instructions and check that the electrode tips are clean and secure. Test the welder on an unused stainless offcut before touching a finished shield section. Output, pulse time, electrode condition and applied pressure can all affect the weld, so there is no universal setting for every machine.
The two stainless layers should be joined securely without burn-through or excessive distortion. If the layers separate or remain loose, stop and adjust the welder on another offcut in line with the manufacturer's instructions. Do not experiment on a finished shield section.
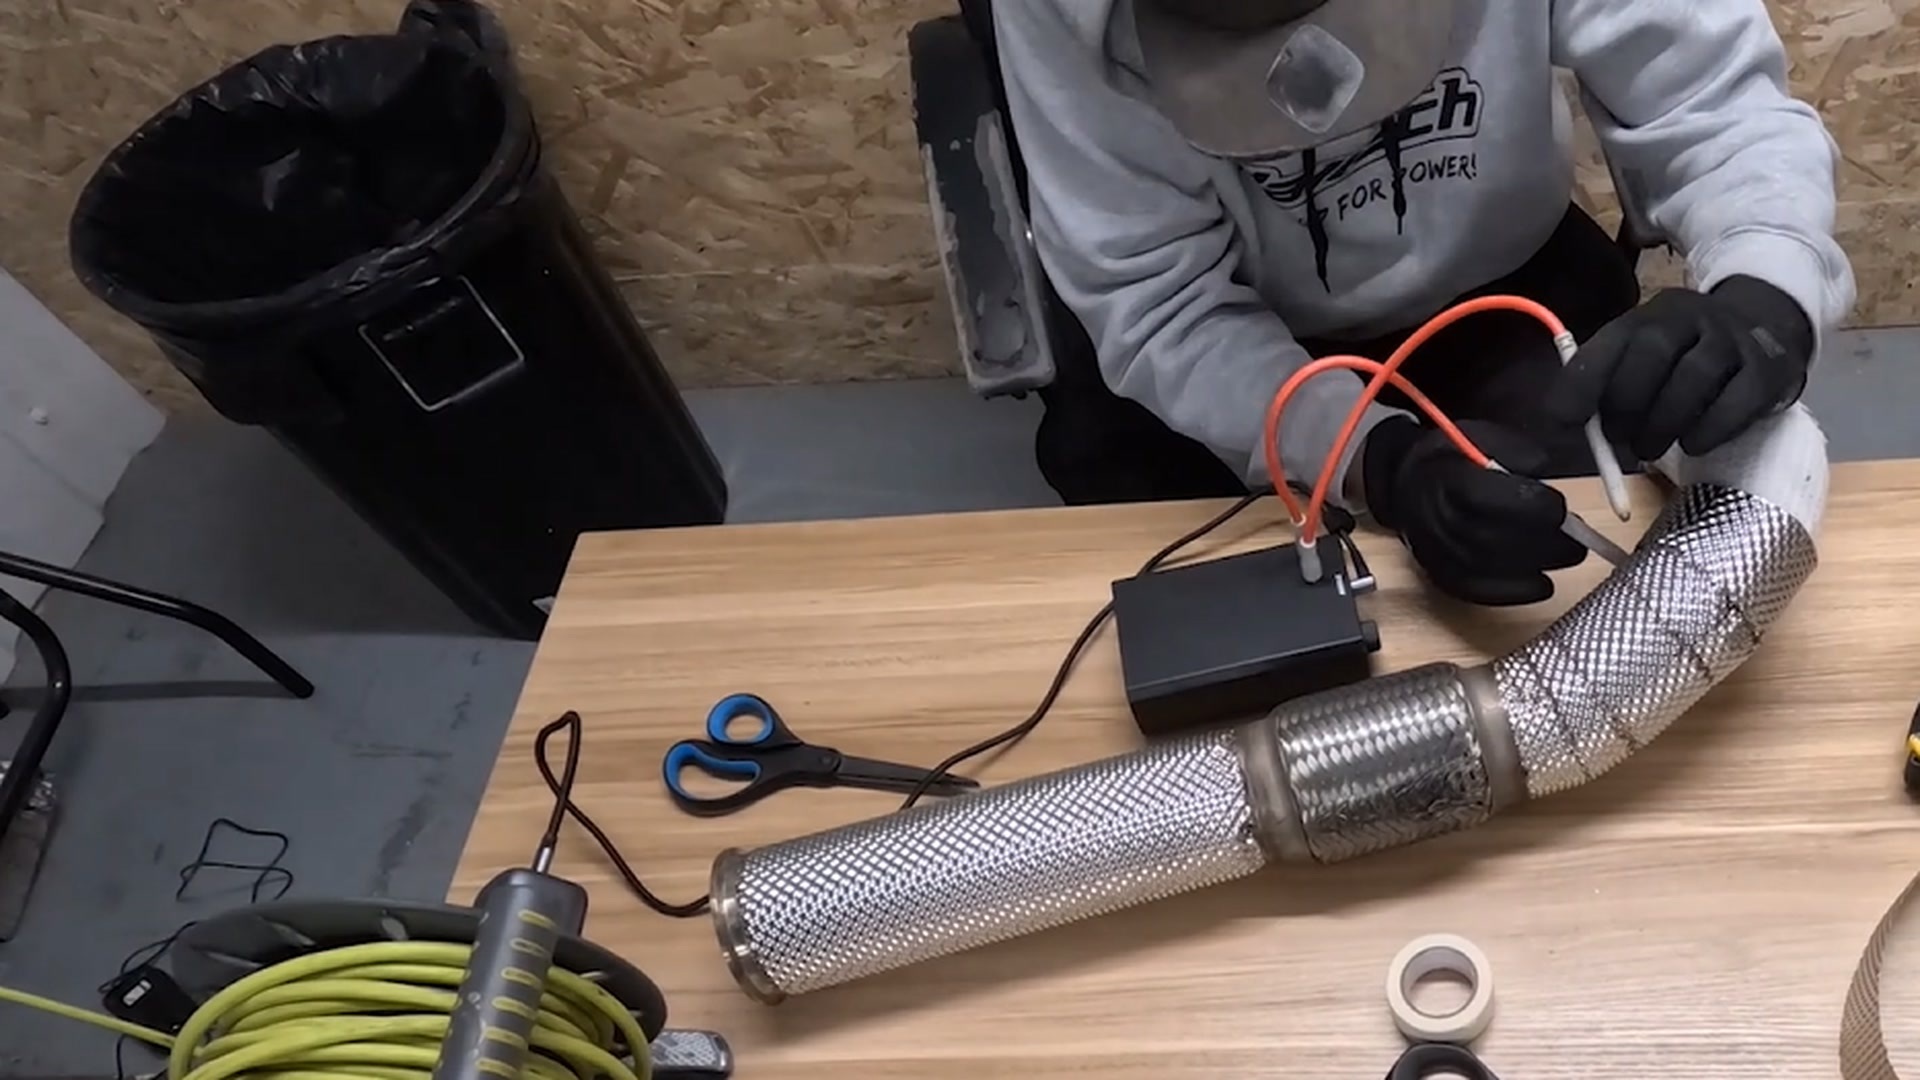
Keep the insulation out of the stainless-to-stainless seam. With the overlap lying flat, add the first few spot welds and check that the material has not moved. As a starting point, space the welds approximately 50–80 mm apart, moving them closer together around curves or anywhere the stainless wants to lift. Allow the metal and welder to cool as required; excessive output can burn through or distort the thin stainless.
The main seams are made by overlapping the stainless sections and spot welding the stainless to itself; the main seams are not continuously welded to the exhaust. Where extra retention is needed, small tack welds can be added around the ends while maintaining a clearance gap of a few millimetres from the flange.
6. Repeat the method on the screamer pipe
Make a separate template for the screamer pipe because its diameter and bends differ from the downpipe. Test-fit its insulation, form the stainless outer skin and weld the seams using the same method.
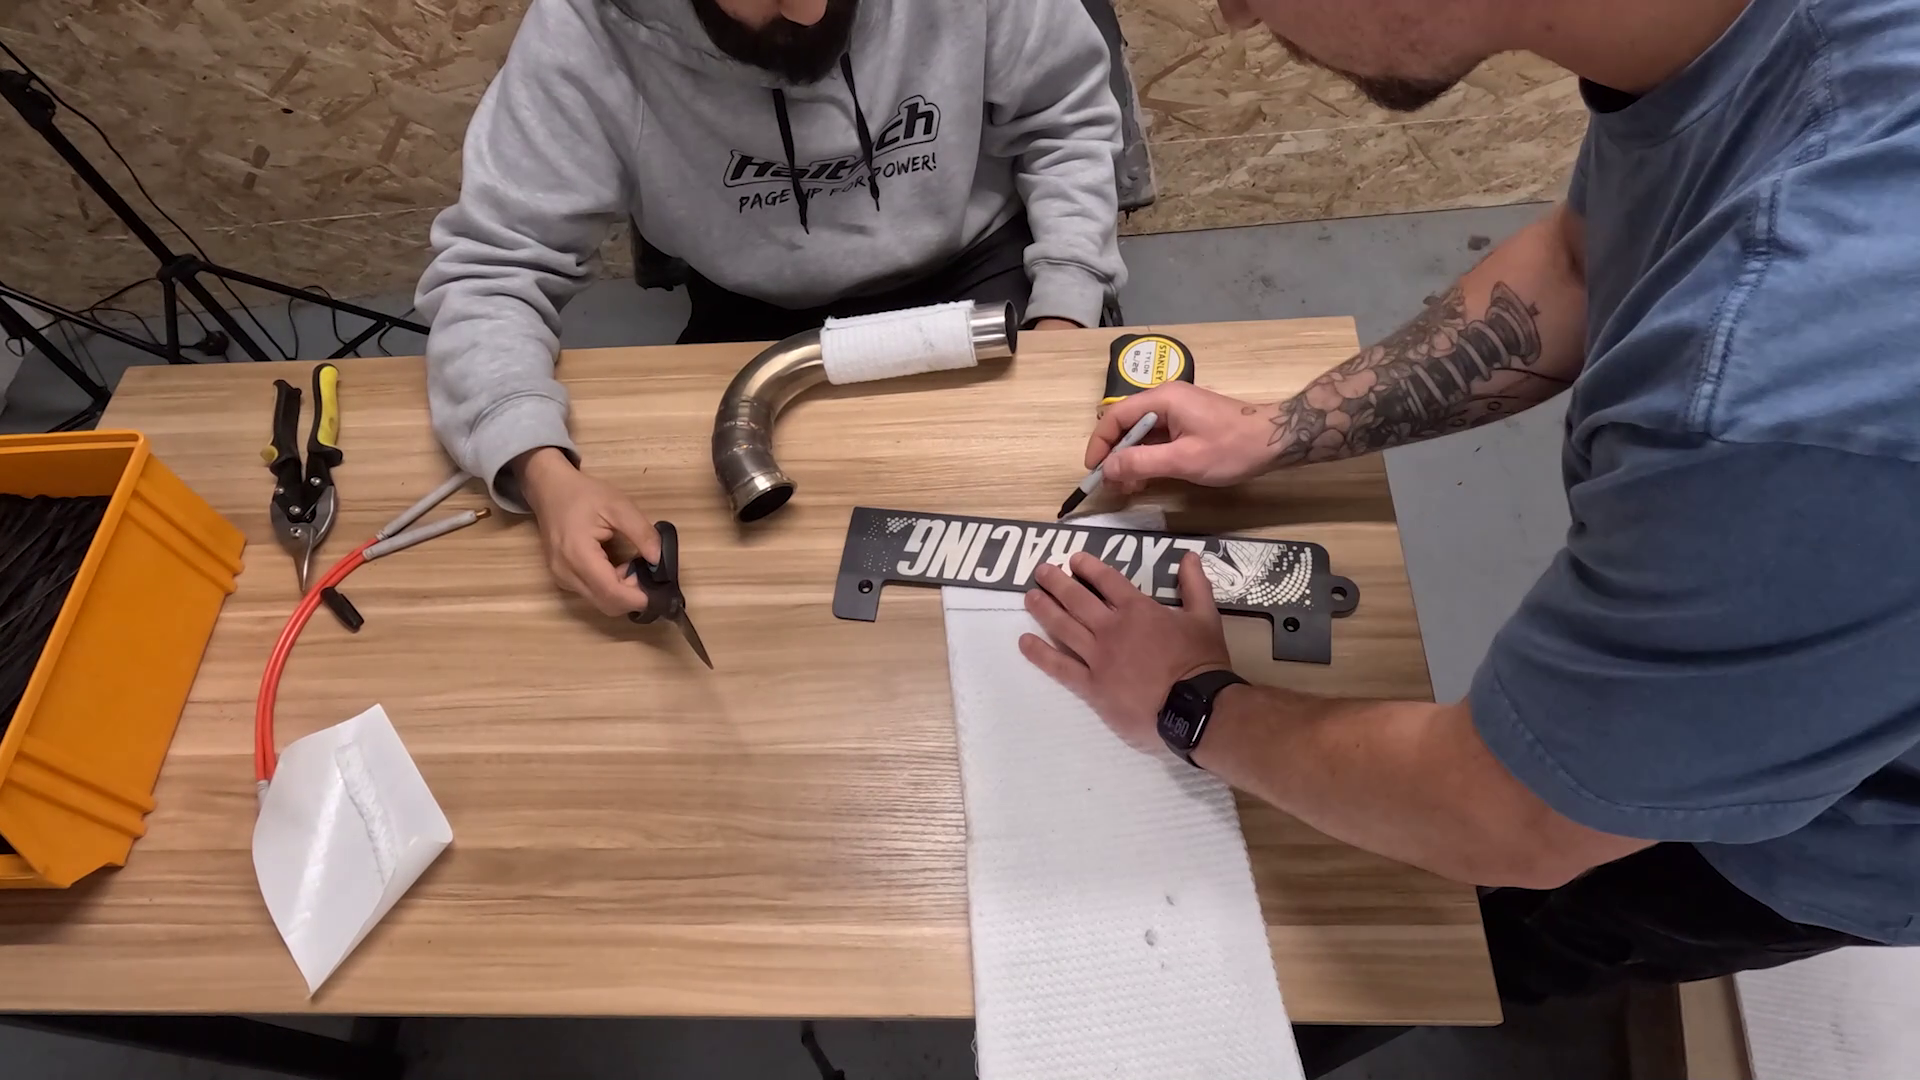
Mark the start and finish points and plan every overlap. Several smaller sections are often easier to shape around an awkward bend than one large piece.
7. Check the completed shields
Allow both shields to cool fully before the final inspection.
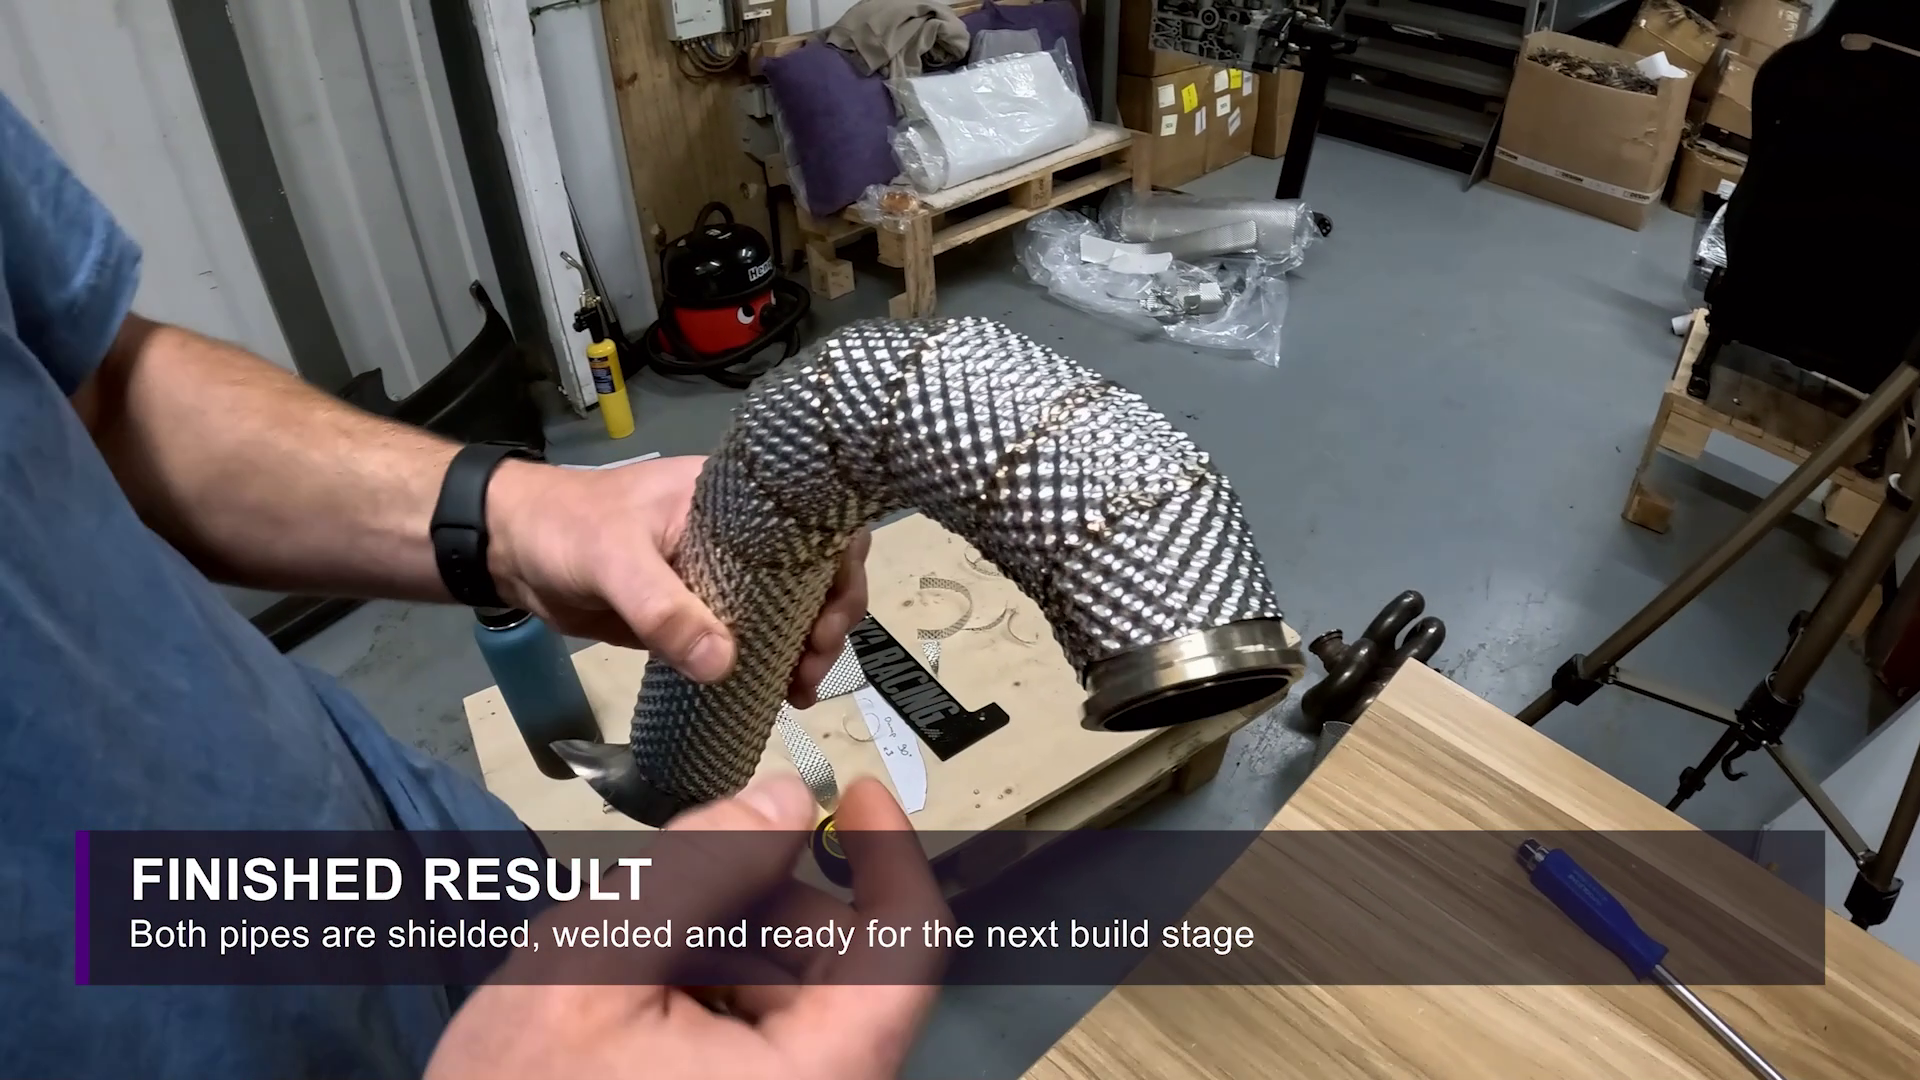
- Every seam is secure, with no lifted sections or unfinished sharp edges.
- The insulation is contained beneath the stainless outer skin.
- Flanges, sensors, clamps, joints and other service points remain accessible.
Deburr, fold or otherwise safely contain every exposed stainless edge before refitting the component. Do not leave an edge that could cut a hand, hose or nearby wiring during installation or later maintenance.
If you are fitting the supplied Exoracing logo plates, place each one on a suitable visible section and secure it with four spot welds, one at each corner.
The kit we used
We used the Exoracing DIY Weldable Exhaust Heat Shield Kit for both parts. We designed it for experienced DIY fabricators and professional workshops that want to make a close-fitting shield around suitable exhaust pipework. Measure the complete area before ordering and allow extra material for curves, trimming and welded overlaps.
 Exoracing DIY Weldable Exhaust Heat Shield Kit 1000mm x 600mm
Embossed stainless and adhesive-backed insulation for fabricating a custom shield around suitable exhaust components.
From £169.99
Common weldable heat-shield mistakes
- Cutting the stainless too early: Finalise the paper pattern before cutting the kit material.
- Rushing both layers: Test-fit the insulation first so you can correct it before forming the stainless.
- Covering service points: Recheck flange, sensor, clamp and joint access before the first weld.
- Welding a raised overlap: Stop and reshape it, checking that no insulation is trapped in the seam.
- Reusing the downpipe pattern: Make a separate pattern for the screamer pipe.
When to choose another solution
Do not use a fabricated shield to hide a cracked exhaust, oil or fuel leak, damaged wiring, unsafe hose routing or a loose component. Repair the fault and improve routing first.
Choose another solution if you cannot cut, form and spot weld thin stainless safely. Exhaust wrap may be simpler when you want to retain heat at the exhaust, while a separate rigid barrier may be better when you need an air gap between the exhaust and a floor, bulkhead or vulnerable part.
If you are unsure which type of protection fits the problem, use our car heat-protection selector. It starts with the heat source, the part at risk and the available clearance.
Weldable exhaust heat shield FAQs
Can I install the kit with the manifold or downpipe still on the car?
We strongly recommend removing the component wherever practical. It gives you better access for templating, forming and checking the seams, while reducing the risk of cutting or welding near fuel lines, wiring, batteries or combustible material.
Is the stainless heat shield welded directly to the exhaust?
The main seams are not. Overlap the stainless sections by about 20mm and spot weld the two stainless layers to each other. Small retaining tacks may be added around the ends where needed, while leaving a few millimetres of clearance from a flange.
Can the heat shield be made as a removable clamshell?
The stainless outer skin can be made as a retained clamshell-style cover where the shape allows it. The adhesive-backed insulation still attaches directly to the exhaust in separate sections, so it is not a complete reusable clamshell.
What type of welder do I need for the stainless sheet?
Use a resistance spot welder that can join two layers of 0.1mm 304 stainless steel. We joined the material with a low-cost battery-powered machine during development, but a better-quality welder should give stronger and more consistent results. Always prove the setting on an offcut first.
How far apart should the spot welds be?
Start with roughly 50mm to 80mm between welds. Move them closer around curves or anywhere the stainless lifts and leaves a visible gap. The finished overlap should remain flat and secure.
Why should the insulation stop short of each stainless seam?
It leaves a flat metal-to-metal overlap for spot welding. If insulation is trapped under the seam, it can hold the stainless apart and create a raised edge or open gap.
Will one kit cover a complete manifold or downpipe?
That depends on the component's size and shape. Both supplied sheets measure 1000mm x 600mm. Measure the whole area and allow extra material for curves, trimming and about 20mm of overlap at every stainless seam before ordering.
Can I clean the completed stainless heat shield?
Yes, once the exhaust is completely cool. Use a cleaning method that is safe for stainless and avoid anything that could damage the seams or reach the insulation underneath.
Need help choosing or fitting heat protection?
If you are not confident cutting, forming or welding the shield, use an experienced fabricator. You can also contact Exoracing for help or browse the wider Exoracing heat-management range.
Shop the Weldable Exhaust Heat Shield KitAbout the Author
Matt is the owner of Exoracing who are a UK-based heat-management and performance-parts specialist. Since 2018, the team has helped enthusiasts and workshops choose and fit protection for turbos, manifolds, downpipes, hoses, wiring and other parts on modified cars.